
How to make a sourdough bread starter
The sourdough infatuation shows no sign of letting up here. How about you? Were you one of the countless bakers who took to the challenge of making their own bread during the COVID lockdowns? Did you spend hours one Saturday night watching YouTube videos on getting the best rise from your loaf? (don’t judge!) Have you been feeling a little left out, and are yet to jump on the sourdough bandwagon? Now’s your time. Let’s talk about how to make your own homemade sourdough starter.

If you’re new here, you might not know I also run a small online store where I keep many of the tools I cook with every day, along with a few timeless homewares for good, slow living…
What is a sourdough starter?
A beginner sourdough starter recipe is nothing more than flour, water, and a little love. Essentially, strong flour and water is combined, covered, and let sit to allow natural yeasts & bacteria in the air to ferment and develop into a thick liquid.
No two bread starters are the same, and they will smell different at different stages. In the first few days of making my last starter, it smelt like a nail polish remover. While it doesn’t smell great, it’s completely normal and a sign of a healthy starter!
There are many ways to make your own sourdough starter. You could beg, borrow, or steal a starter from someone. Buy a starter (either dehydrated or fresh) to give you a bit of a head start, or start from scratch. Personally, I’ve tried all three in my sourdough experience (this isn’t my first rodeo!). I’ve been in A LOT of food stores in my travels, and I’ve only been in a handful where you can buy sourdough starter ready to bake with immediately, so DIY has always been my go-to.
Most winters I get back into making sourdough, but when summer rolls around, life becomes a little too crazy to keep it going! To be honest it really doesn’t matter which way you start. All three will work just fine. But if you want to take the DIY road, let’s talk about how to make a sourdough starter.
Here’s an easy sourdough starter kit with everything you need to get started
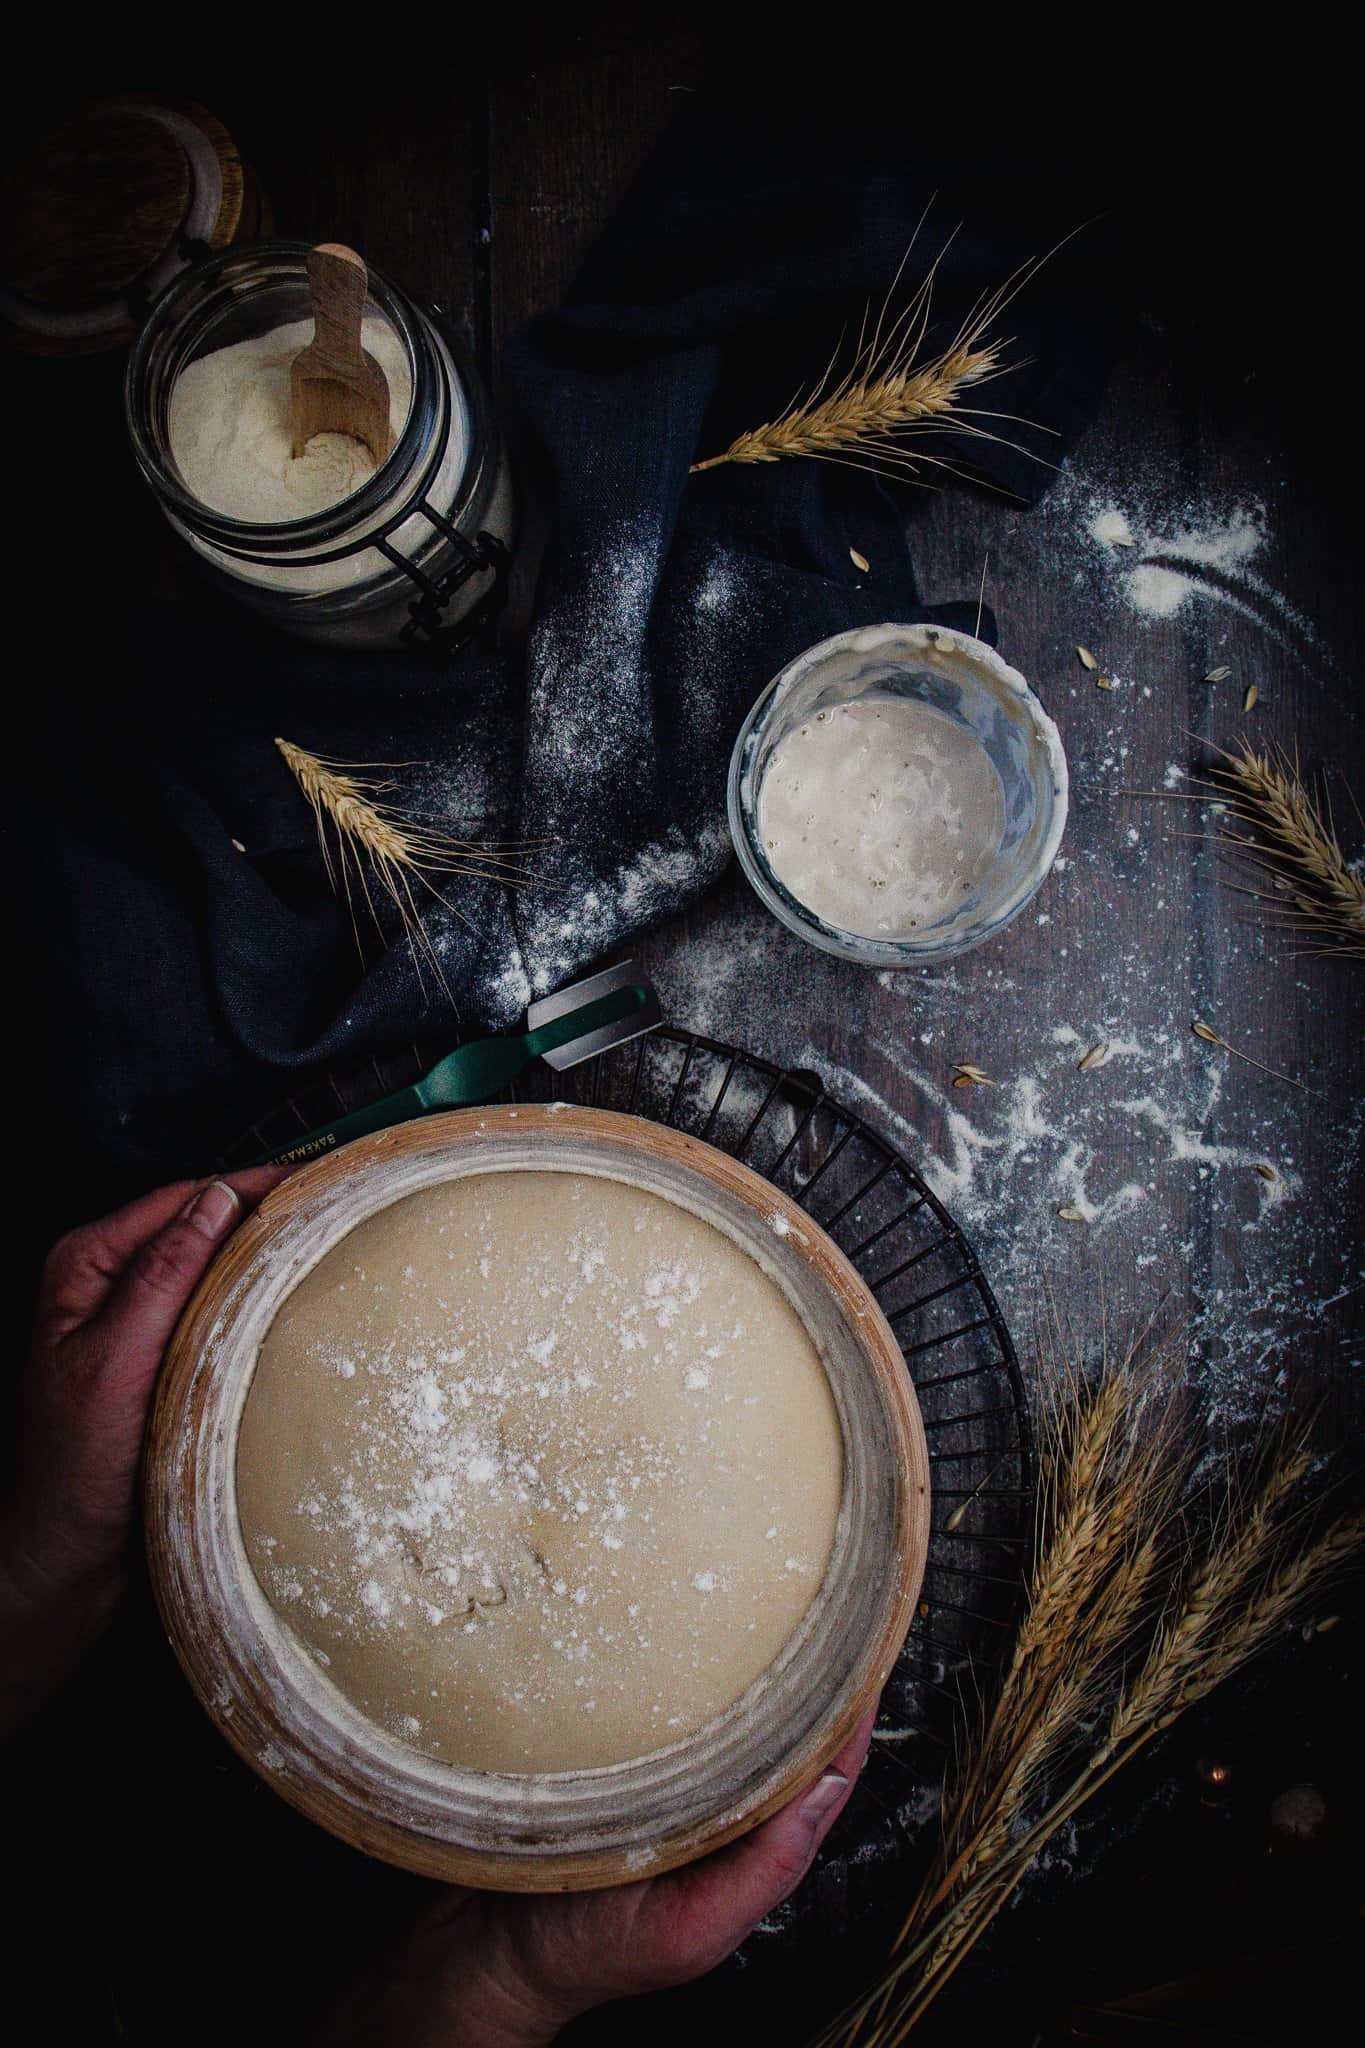
- A clean glass jar – I love Kilner jars and was recently gifted this beauty above by Kilner Australia. It’s part of their sourdough-making kit and it’s the perfect sourdough starter jar. Its straight sides make scraping down the jar a breeze! I generally use a glass jar because I can see how active my starter is and easily see how much it’s risen.
- Bread flour (whole wheat flour or flour of choice). Everyone seems to have a different opinion on what is the best flour for homemade sourdough bread starter. I’m a big fan of organic flours from my local wholefoods. I currently use white bread flour, but in the past, I’ve also tried whole-grain flour and rye flour.You could also try all purpose flour, just be aware that different types of flour require different ratios of bread to water.
- Filtered water (or pre-boiled and cooled tap water). Chlorinated water can have an adverse effect on your starter. Always be sure to boil water prior to use. Alternatively, use bottled water or filtered water.
- Electronic kitchen scales weighing both the water and flour are the best way to have a consistent starter. Measuring by volume as popped to weight is not accurate as a cup of flour can vary depending on how packed the flour is in the measuring cup.
- Metal or silicone spoons for mixing and scraping down the sides of the jar.
- Elastic band to wrap around your starter jar. This helps you gauge how fast the starter rises. You could also use a sharpie and just scribble on the side of your jar.
How to make sourdough starter…
Making a bread starter from scratch generally takes at least 7 days before you have an active, and ready to bake with starter. Most of the time though, I find that it takes me a little longer (up to 14 days) till I’m completely happy to start baking with it. This could be because I tend to bake more in Winter (and our Winters are COLD) or because I sporadically bake bread, and there is not as much wild yeast floating around my house.
DAY 1
In your super clean jar, mix even parts of water and flour using an accurate kitchen scale. Because we are just starting I recommend for best results starting small with a small amount of starter. 50 grams of flour / 50 grams of water is perfect and it’s less waste later on. When thoroughly combined, scrape down the sides of your jar, loosely cover, and pop it on the bench out of direct sunlight, at room temperature for 24 hours to let the fermentation process begin! Don’t be put off if there’s not a lot of activity in the the first couple of days. Stick with it and you’ll have those small bubbles appearing in no time.
DAYS 2, 3
Feed your starter with 50g flour and 50 ml water. Mix well, scrape down the sides, cover, and rest in a warm-ish spot for 24 hours.
DAYS 4, 5, 6
Discard half of the starter. Feed your remaining starter with 50g flour and 50 ml water. Mix well, scrape down the sides, cover, and rest in a warm place for 24 hours. At this stage, I also put a rubber band around the jar at the height my starter is. It’s a great way of measuring when the starter is at its peak and had doubled in size.
DAY 7
By this stage you may have a beautiful, active starter, full of bubbles, that the starter doubles in size consistently after each feed. If not it may require a few more days of love and attention. Repeat steps on days 4-6 until you see an active, bubbly, and ready-to-bake starter!
What is feeding?
Feeding your homemade sourdough starter is essential to keeping it alive and healthy. It’s a living thing and needs a little love. Just like creating a starter from scratch, feeding it with a little bit of flour and water is how you keep it healthy.
Starters are hungry beasts and like to be fed often. Normally daily is perfect but this will be determined by your climate. I consistently feed with the 50g water/ 50g flour ratio. You always want your starter to be hungry before feeding it, otherwise, you can end up with a sluggish starter.
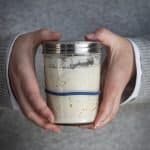
To tell if it’s hungry, always make sure it has risen and fallen before feeding again. This is where that glass jar comes in handy, making it ever so easy to see what’s going on inside the jar.
How to know if your starter is ready
Some people like to use what’s called a float test to see if their new starter is ready to bake with. Personally, I’ve never had mixed results with them, and have generally relied on the look of my starter to determine if it’s ready to bake with or not.
Every starter is different every day. From the time you feed your bread starter to when it is ready for baking is not an exact science. The time of the year, temperature, humidity, and whether my house has heating on, all play a part in the rising time of your sourdough starter. On an average 24C day my sourdough starter is ready to bake with approximately 9-10 hours after feeding. The best way I find is to put a rubber band around the jar at the height my starter is after it’s fed and you’ve scraped down the sides of your jar. The starter is at its peak when it has doubled in size.
Want to give a float test a try? Here’s how… In a tall jar pop in enough filtered lukewarm water til it’s 3/4 full. Add a small drop (about 1/2 teaspoon) of the starter. If it floats, it’s good to go and you can start your sourdough bread dough. If it sinks to the bottom, it is either soon to bake or you’ve missed your window.
Common questions
There are so many different flours I can use. How do I decide which is the best sourdough starter flour for me?
Ok, so over the years I have tried a few different flours in recipes for bread starters. Years ago I started with wholemeal. This was way before sourdough bread making was a thing and there was limited information (as well as good quality whole grain flour) available. It was ok, but I didn’t want to only make wholemeal sourdough bread, so it didn’t last long.
For a while, I used rye flour. It’s great for those forgetful and not-so-punctual sourdough feeders, as it’s relatively forgiving. What I didn’t love was that it doesn’t give a visually active starter and always looks quite sluggish. If you aren’t an experienced sourdough baker, it can be quite demoralizing. I was always analyzing if it was working or not, and with social media full of bubbly, overly active sourdough starters, this didn’t help.
I’ve now been baking sourdough on a regular basis for a couple of years, and my sourdough starter recipe is equal parts flour and water (in grams). It’s an easy white bread flour sourdough starter that I’ve found to be really forgiving and it makes a delicious sourdough bread recipe.
Is sourdough easy to make?
There is so much information out there about sourdough baking. You can totally go down a big, deep rabbit hole with Pinterest alone! I look at it that its bread. Plain, simple, it’s been made for centuries, bread. Is every loaf perfect? No, it’s not. But we’re not talking about a beauty contest here. It’s going on the table with soup for supper or toasted with a bit of butter for breakfast to feed my family. And that is what’s important. Try a few and find a basic sourdough bread recipe that works for you.
I have dark liquid on top of the starter. What do I do?
A little liquid on top means that your starter is hungry and it’s time for a feed. Just mix it through and feed as normal. This is a good sign!
It’s winter and my bread starter is a little sluggish. How do I warm it up?
I find when our house is really cold (under 15C), my bread starter recipe doesn’t perform as well as when we have a constant 22-24C temperature. To combat this try these three easy bread starter tips
- feed your starter with luke warm water (not hot), to activate it a little faster.
- In winter especially with much cooler temperatures, I have an old beenie that I cover my entire jar with to keep the heat in
- Make sure your starter is in a warm spot in your house out of direct sunlight. Mine sits in the corner of my kitchen bench away from the oven. It’s been living there for a couple of years now so I take that as a good sign that it likes it there!
How to feed sourdough starter
Now that you’ve got your own homemade sourdough starter alive and kicking, you need to feed it daily…
Sourdough starter feeding should be done at roughly the same time each day if you are a regular baker. I feed mine every morning while I make breakfast.
Discard half the starter. If you are changing jars, I use about 50g starter (roughly 2 tbsp). Feed your starter with 50g flour and 50 ml water. Mix well, scrape down the sides, cover, and rest in a warm-ish spot for 24 hours.
How often you feed will depend on the climate of where you live. If it’s winter or you live in colder parts, you may get away with feeding less often. If you live in the tropics, once a day may not be enough. I live in central NSW, Australia in a temperate climate. cold winters, Warm summers. I feed once a day and it works perfectly. If I’m on holiday or really busy at the store, I sometimes pop my starter in the fridge and feed it every week or so.
What if I forget to feed my starter?
Don’t stress if you forget a day or two. My sourdough starter is now a couple of years old and I only feed it in the leadup to weekend baking. If it doesn’t get fed for a few days, just remove any crusty bits and feed it as usual. Depending on how long it’s been between feeds, it may take a day or two to get it back to full strength.
I once didn’t feed my starter for about a month and it had completely dried out. I just scaped everything out and popped the water/flour feed into the jar. Basically, the bacteria had just hibernated and by rehydrating with flour and water, it reactivated. It took a few days of feeding, but it was back to normal within a few days.
Don’t throw out the discarded starter. Some of my favourite sourdough discard recipes to use it up (instead of wasting it) include…
- breadsticks / seeded crispbread
- banana bread – one word. obsessed.
- pancakes
- pizza dough
What’s next?
The big question is are you going to name your starter? Now obviously this is completely optional. I have found when I name it, I take a bit better care of it. Mine is called Billy Bob The Bread Starter. What’s yours?
Now you are armed with your homemade starter, your sourdough world is your oyster. You’ll constantly be looking at ways to include sourdough starters in your baking and baking all the homemade bread you can think of. Maybe the odd Saturday night will be spent learning tips on YouTube! It’s kinda addictive. Warning you now!
Obsessed with bread baking? Me too. Here are a couple of my favourite bread posts…
Ok, now go forth and bake (break) lots of bread
x
THIS POST IS IN COLLABORATION WITH KILNER AUSTRALIA & BAKEMASTER AUSTRALIA. TWO BRANDS I LOVE AND ADORE. ALL OPINIONS ARE 100% MY OWN.
Start slow. Cook confidently.
Cast Iron Cooking 101
From slow cooked stews to warm bread fresh from the oven, this guide will help you feel confident cooking with cast iron at home.
How to make a sourdough bread starter
- Prep Time: 35 minutes
- Total Time: 35 minutes
- Yield: 1 starter 1x
- Category: bread
- Cuisine: Australian
Description
The first step in your sourdough journey… How to make a sourdough starter from scratch
Ingredients
- 350 g Bread Flour
- 350 g Water (filtered or boiled then left to cool)
Instructions
- Day 1 In your super clean glass jar, mix even parts water and flour. Because we are just starting I recommend starting small. 50g flour / 50g water is perfect and it’s less waste later on. When thoroughly combined, scrape down the sides of your jar, loosely cover, and pop it on the bench out of direct sunlight for 24 hours.
- Days 2, and 3 Feed your starter with 50g flour and 50 ml water. Mix well, scrape down the sides, cover, and rest in a warm-ish spot for 24 hours.
- Days 4, 5, and 6 Discard half the starter. Feed your starter with 50g flour and 50 ml water. Mix well, scrape down the sides, cover, and rest in a warm-ish spot for 24 hours. At this stage, I also put a rubber band around the jar at the height of my starter. It’s a great way of measuring when the starter is at its peak and had doubled in size.
- Day 7 By this stage you may have a beautiful, active starter, full of bubbles, that is consistently doubling in size after each feed. If not it may require a few more days of love and attention. Repeat steps on days 4-6 until you see an active, bubbly, and ready-to-bake starter!
Notes
Don’t be discouraged if your starter isn’t ready to go on day 7. Most of the time though, I find that it takes me a little longer (up to 14 days) till I’m completely happy to start baking with it. This could be because I tend to bake more in Winter (and our Winters are COLD) or because I sporadically bake bread, there are not as many wild yeasts floating around my house.


This bread starter recipe turned out fantastic. It is now bubbly and I can’t wait to bake my first loaf!
Love reading your write-up on sourdough starter preparation. I am going to try.
Thanks so much! Good luck on your sourdough journey x
So happy I found this site. I have used your recipe and my starter is so bubbly now. I can’t wait to make my 1st loaf too
Yay! That’s fantastic! Good luck with your first loaf x
I’m new at sour dough, made my own starter. It’s a month old and I’ll be going out of town can input it in the fridge for week while I’m gone? After do I place it back on my cabinet or keep it in the fridge? I’ll only be making a loaf or two once a week so curious what would be the best way to store when it’s not used daily.
Thank you and your instructions and recipe were fantastic.
Yes, you can definitely put it in the fridge while you are away. Before you go, feed it and pop it straight in the fridge. It will be good for a week or two. When you get home, remove it from the fridge and let it come to room temperature, then feed it. I find that when mine has been in the fridge for a bit it might take a couple of feeds to get it back into shape. I only bake once a week, so my starter normally is in the fridge most of the week. I then take it out on a thursday, feed thurs, fri, sat. Start the dough on Saturday afternoon, then bake Sun morning. Hope this all makes sense! Thanks for following along xx
I ordered the jars you recommended. I plan to try this starter recipe tomorrow! Wish me luck and thank you for sharing!
Good luck on your sourdough journey Casandra! Thanks for reading x
I have tried and failed using other starter methods, there is so much information on the Internet and no one is the same, I decided to give it one last try and came across your recipe, I’m so glad I did after 7 days I now have a perfectly active starter 😊 I’m now looking forward to making my own sourdough bread. Thank you so much, your instructions are so clear and easy to follow.
So happy to hear that it worked for you! It’s just the beginning. Welcome to the world of sourdough!