
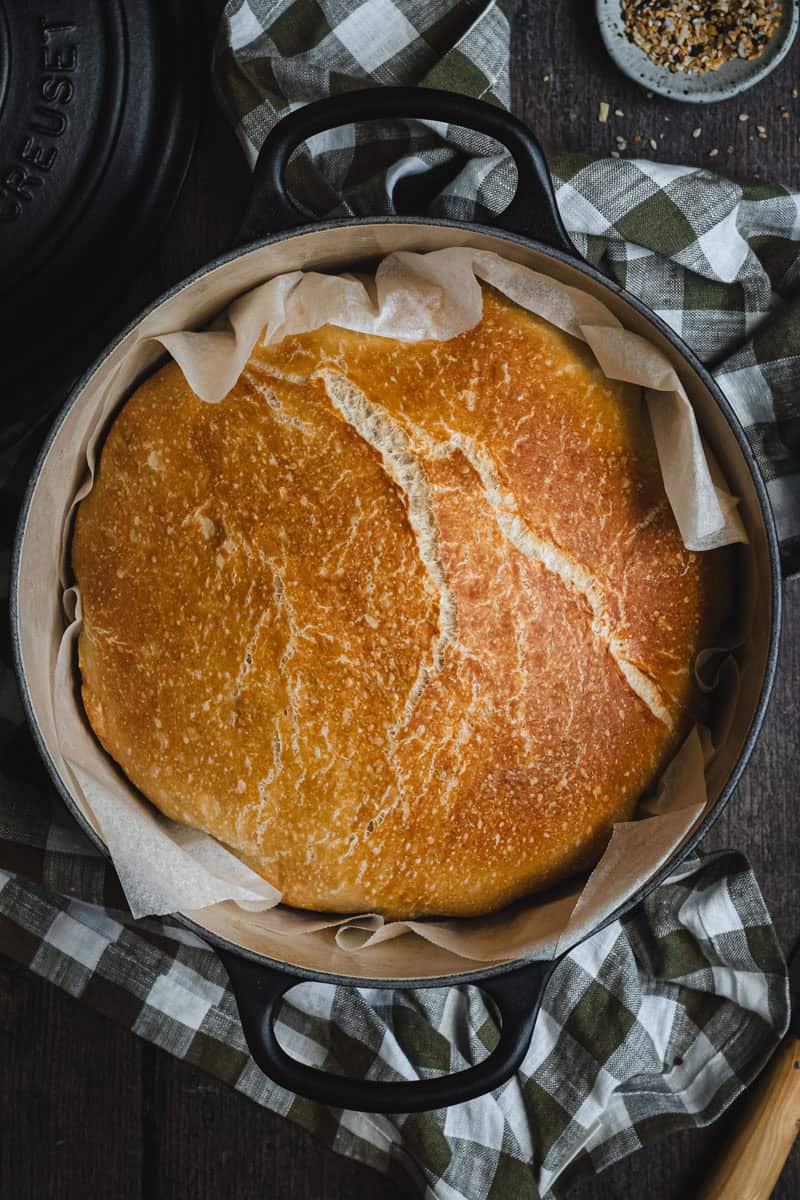
Easy Dutch Oven Bread (Hunter’s Bread!)
There’s something homey about a loaf of freshly baked white bread. The golden crust, the light, fluffy interior, and that unmistakable smell filling your kitchen. It’s hard to beat, isn’t it?! This easy Dutch oven bread is super easy, super delicious, and super great for lunchboxes – just ask Hunter!
If you’ve ever put homemade bread in the “too hard basket,” this one’s for you!

If you’re new here, you might not know I also run a small online store where I keep many of the tools I cook with every day, along with a few timeless homewares for good, slow living…
Well, Autumn has arrived, and you know what that means… It’s time to bake bread! Over Summer, baking bread just gets a bit lost in the chaos of the warmer months. The sourdough starter goes into the freezer to hibernate, the bannetons get stored away and aside for a quickbread here and there, and a different side of baking takes hold in my kitchen. But once it cools and Autumn rolls in, I’m all about the bread, and I get back into my weekly Sunday loaves.
Most Sundays, I bake my Mum & Dad a loaf for their Sunday night supper. One weekend, I gave my sister a loaf, and my nephew (who is 5 and rarely eats my cooking) declared this recipe “so good I wanna eat it every day”, and so, in our family, this easy Dutch oven bread recipe quickly got the name “Hunter’s bread”, and it kinda stuck!
While this recipe tastes like a proper artisan bread, it’s really quite easy, full of simple ingredients, and all the flavor comes from the slow, overnight rise. And the best part? You don’t need to be a seasoned baker or have any special equipment beyond a Dutch oven and a stand mixer. This Dutch oven bread recipe is perfect for both beginners and home bakers.
Want to take it down a notch in effort. Take a look at my no-knead Dutch oven bread recipe.
So, Why Use a Dutch Oven for Bread?
A Dutch oven will turn your regular oven into something much closer to a proper bread oven. As the dough bakes, it releases moisture. With the lid on, that moisture is trapped, creating a steamy environment around the loaf. This keeps the surface soft in those first crucial minutes, allowing the bread to rise fully before the crust sets. That’s what gives you that beautiful oven spring – the rise and shape that makes a loaf feel like proper bread.
At the same time, cast iron cookware holds heat incredibly well, surrounding the dough with steady, even warmth. With no hot spots, it just gives a consistent heat from go to whoa. Which gives an end result is exactly what you want: a deep golden crust that cracks as it cools, and a soft, airy crumb inside.
Preheating vs not preheating your Dutch oven
You’ll see A LOT of recipes out there telling you to preheat your Dutch oven until it’s blisteringly hot before adding the dough. And yes… that method does work. It’s perfect for a seasoned cast-iron Dutch oven. But when you’re cooking in enamel cast iron, it’s not the way that is recommended. No, I’m going to be blunt, if you’ve invested in a good quality enamel Dutch oven, then please don’t do it. It’s only going to end in tears (Yep, I’ve seen it happen!) when your enamel gets thermal shock and pops off the pot.
Preheating the Dutch oven is the more traditional method. The empty pot is heated in the oven first, then the dough is carefully popped into the hot base. That immediate blast of heat can give you a quick lift (what bakers call oven spring) and a slightly thicker crust. The downside? It can be a bit fiddly – not to mention risky when you’re handling a very hot, heavy pot. Have a seasoned cast-iron pot (like a Lodge Dutch oven)? This is your go-to method. It’s going to give you a beautiful, crusty bread every time.
Starting with a cold Dutch oven is my go-to way, so I don’t do any damage to my enamel pot, AND I still get delicious crusty loaves. This is the method I use at home… Instead of preheating, the dough goes straight into the pot, the lid goes on, and the whole thing goes into the oven together. As the oven heats, the dough warms gradually. Steam builds slowly inside the pot, and the bread rises gently before the crust sets. I like to think of it as a bit of a third rise — and it’s far more forgiving if you’re new to bread baking (and on your pot!)
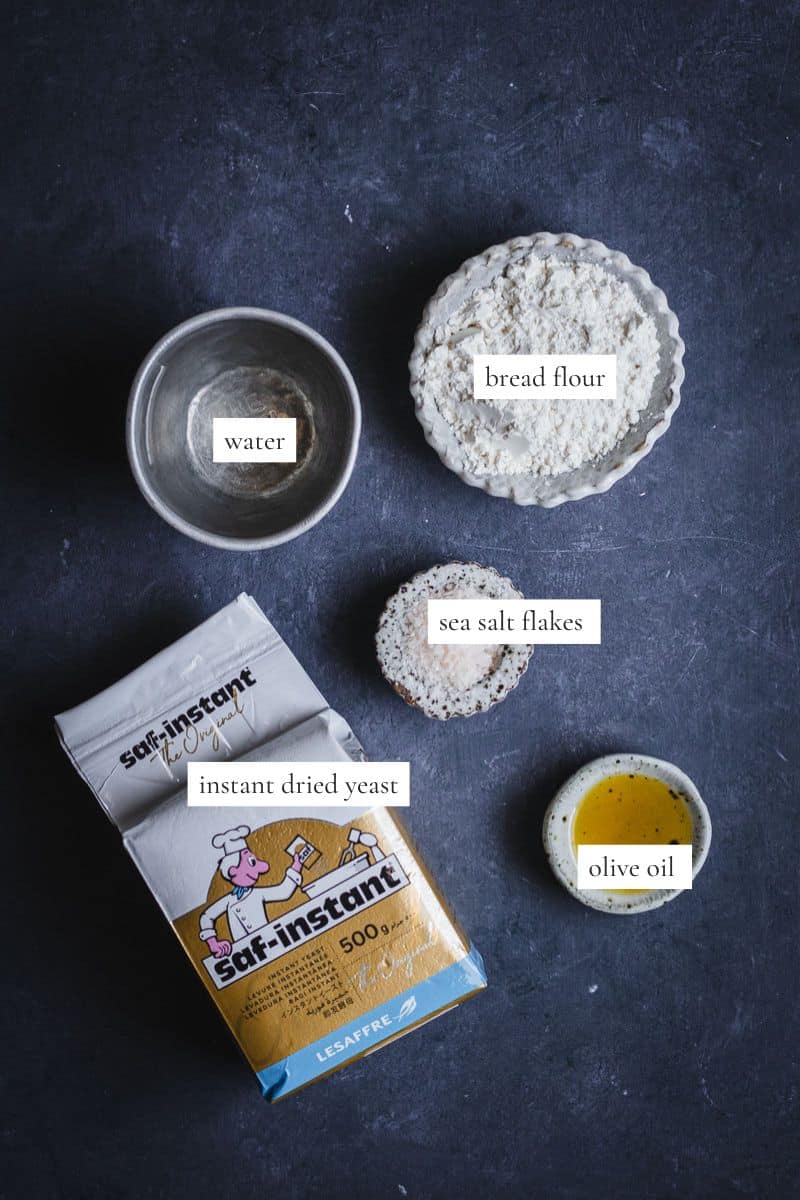
Ingredients
- Bread flour. Don’t substitute with a plain, all-purpose flour. Bread flour has a higher protein content, which leads to slightly chewier bread with more structure.
- Dried instant yeast. I love using instant yeast. It can be mixed directly into the flour and works well with long fermentation.
- Sea Salt Flakes – Murray River pink salt is my salt of choice; Maldon comes a close second.
- Lukewarm water – Too hot and it could kill the yeast; too cool and fermentation will slow. To me, lukewarm water is when you’re running the tap, and when you run your hand underneath, it’s not cold, yet not hot. Just warm is how I think of it.
- Olive oil
- Butter or oil (for greasing the Dutch oven)
Equipment
Firstly, you’ll need a Dutch oven. I use my 22cm Le Creuset enamel cast iron casserole to make this loaf. You’ll also need a few everyday kitchen utensils… a mixing bowl, a kitchen scale, parchment paper, plastic wrap, a spatula, and a bench scraper.

My Go-To Cast Iron Pot
If there’s one piece of kitchen equipment I couldn’t live without, it’s my 24cm Le Creuset enamel Dutch oven. Steady heat, beautiful cooking and it goes from the stovetop straight to the table.
The details
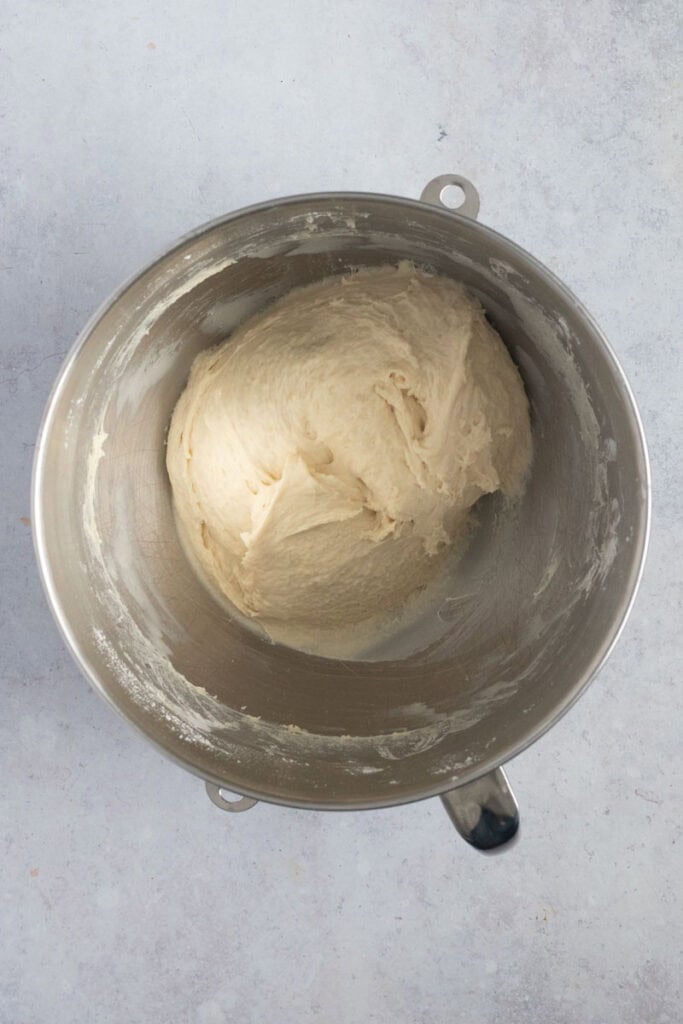
1. Mix the Dough. In a stand mixer fitted with a large mixing bowl and a dough hook, combine flour, salt, olive oil, and instant yeast. Pour in the lukewarm water. Turn on the mixer to speed 2 to combine all the ingredients. Once everything has combined, reduce the speed to 1 and let the mixer knead the dough for 10 minutes.
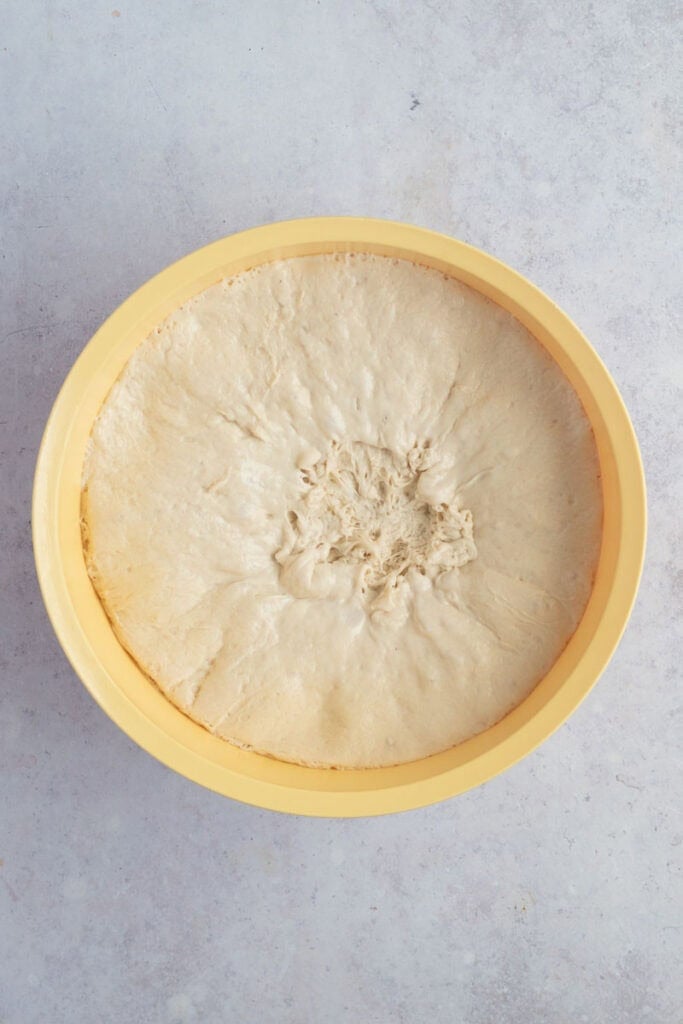
2. First Rise (Bulk Fermentation) Cover the bowl with plastic wrap or a silicon lid and pop it into the fridge overnight to let the dough rise and ferment a little. The dough should double in size and look soft and jiggly on the surface.
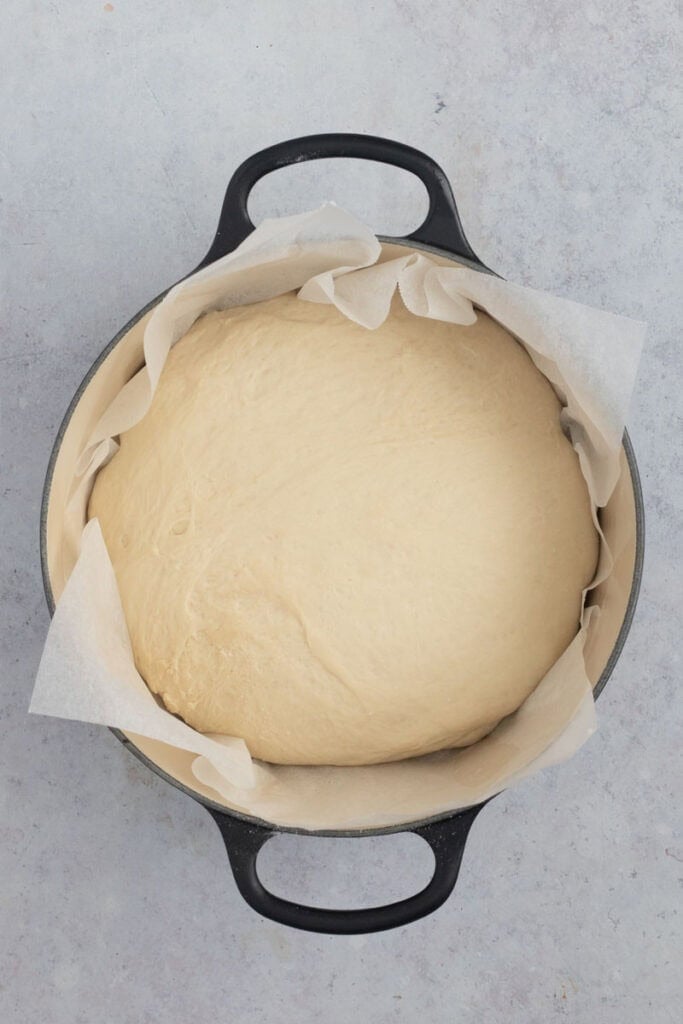
3. Shape the Dough. Remove the dough from the fridge. Lightly flour a clean work surface. Use a spatula or bench scraper to turn the dough out gently—try not to deflate it. Gently fold the edges of the dough underneath toward the center a few times to form a round ball. Transfer the shaped, cold dough ball to a piece of parchment paper. Pop it into an oiled Dutch oven to rise. Let it rest for roughly 2 hours in a warm place for it to come back to room temperature and rise again.
4. Bake the Bread. Preheat the oven to 220°C/390°F. Cover with the lid and pop it into the oven. Bake covered for 30 minutes. Drop the temperature to 190°C/375°F, then remove the lid and continue baking for a further 20 minutes, or until the crust is deep golden brown and the loaf sounds hollow when tapped.
5. Cool Before Slicing. Remove the bread from the Dutch oven and let it cool on a wire rack for at least 1 hour. This helps the texture finish setting and makes slicing easier.


CAST IRON ENABLER Here!
You started with one pot. Now you’re comparing colours and sizes online at midnight. Continue the obsession in my Cast Iron Kitchen HQ.
Want to whip up a loaf for supper tonight? Here’s how
If you don’t have the time (or patience) for an overnight rise, I get it, you can absolutely make this in a single afternoon. While the flavour won’t be quite as deep, and the crumb a little tighter… but you’ll still end up with a warm, crusty loaf that’s more than good enough to put on the table for the family.
Here’s how I do it…
- Mix the dough as per the recipe
- Cover and leave it in a warm spot for 2–3 hours, or until it’s doubled in size.
- Shape it gently (no knocking the air out) and let it rest for another 45–60 minutes while the oven heats.
- Bake as per the recipe.
You’re looking for the dough to feel soft and airy before it goes into the oven – that’s what will give you the best rise. It won’t have quite the same depth of flavour as the overnight version, but it’s a very close second — and sometimes that’s exactly what you need. It’s a quicker version, and perfect for those days when you have a mid-afternoon craving for a loaf of fresh bread with your dinner.
Variations
Add some fresh herbs: Mix in chopped rosemary, thyme, or basil for a herbed loaf.
Top with seeds: Sprinkle sesame, poppy seeds, petpitas, or a bagel mix on the surface before baking.
Add a bit of melted butter or milk to make a slightly softer bread.
Lightly press some fresh edible flowers into the top of the dough before the second rise for a floral look loaf.
Cooks notes
Don’t rush the rise: Give the dough plenty of time to ferment. The flavor and texture both benefit. While you can cook this loaf after a first rise on the bench and a second quick rise, the flavor is nowhere as good as it is on day 2 with an overnight rest in the fridge. I promise you, it’s worth it! I’ve even tried leaving for 2,3 and four nights resting and while all had a similar rise, the flavor developed with each day.
Avoid over-flouring: A sticky dough may seem awkward, but it leads to a moist crumb and airy loaf.
How not to kill your cast iron when baking bread
We’re using a Dutch oven method to cook this bread, which is easy on your cookware. I see time and time again, people who are taught to heat their enamel Dutch oven on 250°C or as hot as your oven goes, without any oil basting the enamel, and preheat it for 30+ minutes. This is a sure way to ruin your beautiful enamel cast-iron cookware, and US culinary shopkeepers just shudder at the thought!
If you are cooking in the oven, ALWAYS have the interior of your pot rubbed with oil or full of liquid, eg, soup, stew, etc. Otherwise, your pot may get thermal shock, and the glass-like enamel can crack. These are slow-cooking vessels and aren’t for dry, high temperatures. In Le Creuset’s wise words…”High heats should never be used to preheat a pan before lowering the heat for cooking”.
So it’s not a perfect loaf…
If things didn’t quite go to plan, here’s where I’d start.
Why didn’t my bread rise?
Most of the time, it comes down to either your yeast or your timing. If your yeast is past it’s best, it simply won’t do the job. And if the dough hasn’t had enough time to rest and develop, it won’t have the strength to rise properly in the oven. Pop it a warm spot, and give it time. You can’t rush baking bread!
My dough is too sticky to handle
Good. That’s exactly how it should be. This is a wetter dough, than say a pizza dough. But this is what gives you that soft, airy, delicious crumb. It’s not meant to feel neat and tidy. A light dusting of flour on your hands or on your bench scraper is really all you need. Just try not to keep adding more to the dough itself – that’s how you end up with a heavy loaf.
Why is my bread dense?
Usually, it’s either too much flour or not enough rise time. You’re looking for a dough that feels soft and a little airy before it goes into the oven. If it’s tight or heavy, the end loaf will be too. Let it sit a little longer next time.
Why didn’t I get a crusty top?
That crust comes down to steam and heat. Make sure the lid stays on for the first part of the bake so the steam can build properly inside the pot. That’s what allows the loaf to rise before the crust sets. Take the lid off towards the end. That’s how you get that golden, crispy loaf!
Why is my dough not rising?
This one’s usually about temperature. If your kitchen is cool, the dough will take longer to wake up. Try moving it somewhere warmer. In winter I pop mine near the stove. A sunny spot near a window, or even inside the oven with just the light on also works.
Serve it up…
As your morning toast and slathered with butter: The simplest and arguably most satisfying way to enjoy a loaf of homemade bread. Add a smear of three berry jam, and I’m in heaven.
Slice and sandwich your favorite sandwich filling combo between 2 slices. Toasting optional!
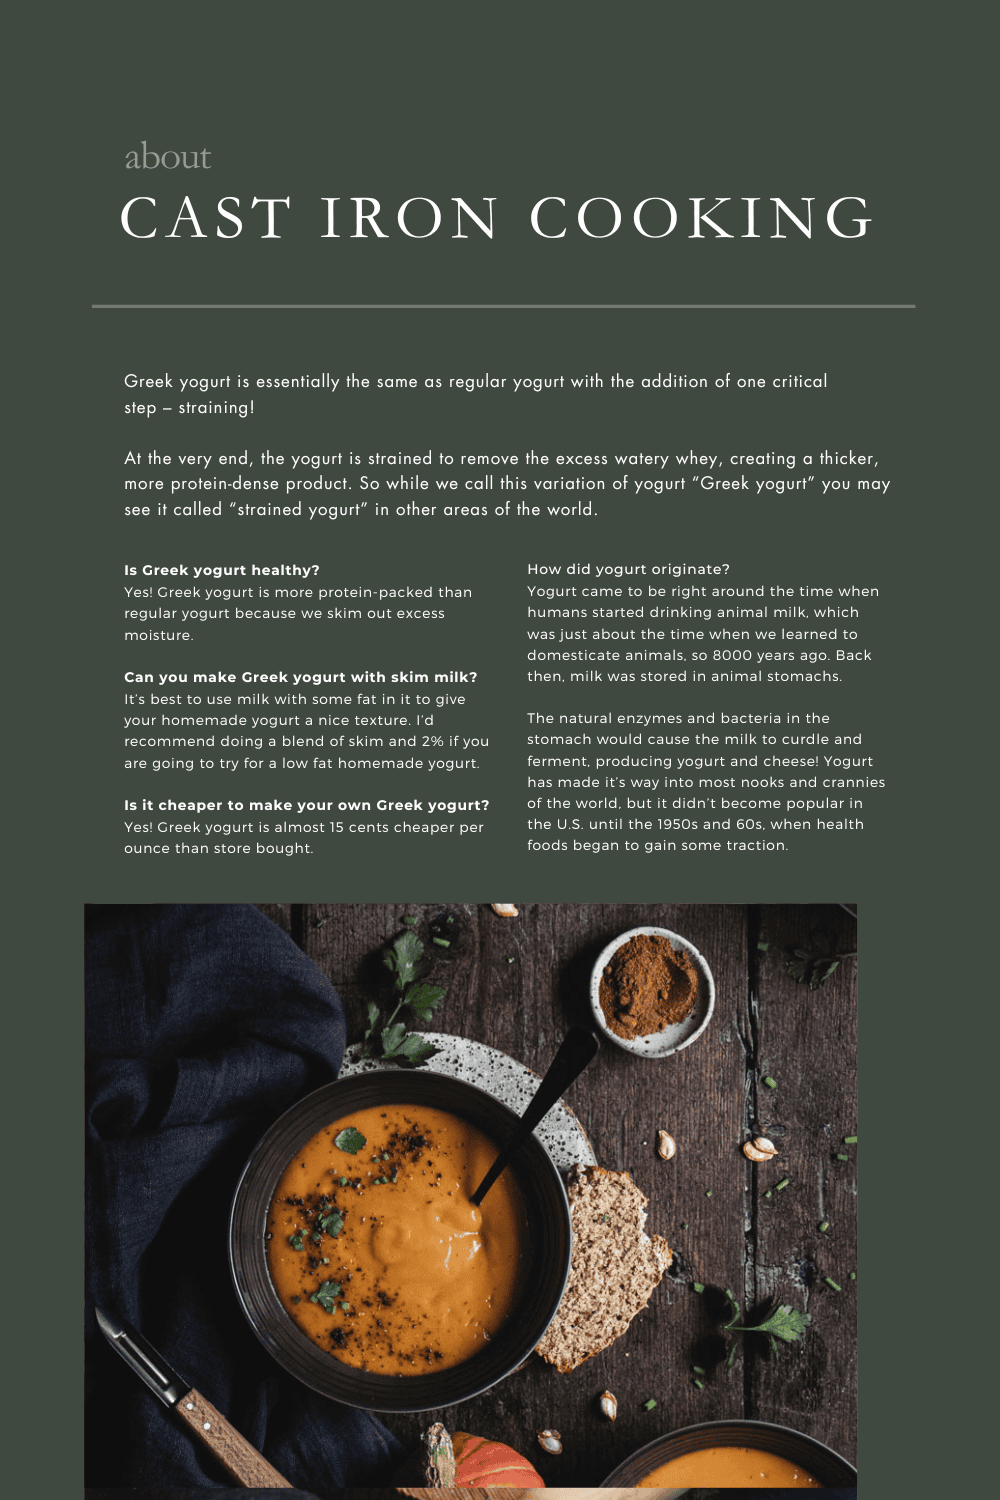
As a side to this hearty pumpkin soup.
Mop up the Guinness beef stew sauce.
Don’t throw away stale bread; instead, make it into croutons for a salad or bread crumbs for chicken schnitzel! Slightly stale slices make excellent French toast. No wastage round here!
Storage
Once your homemade bread is at room temperature, store it in a paper bag or wrapped in a towel for up to 3 days.
To freeze, slice the loaf and store it in a freezer-safe plastic bag. Reheat slices in a toaster or oven as needed.
FAQ’s
Here are a few more bread recipes to try…
Happy Baking x
Start slow. Cook confidently.
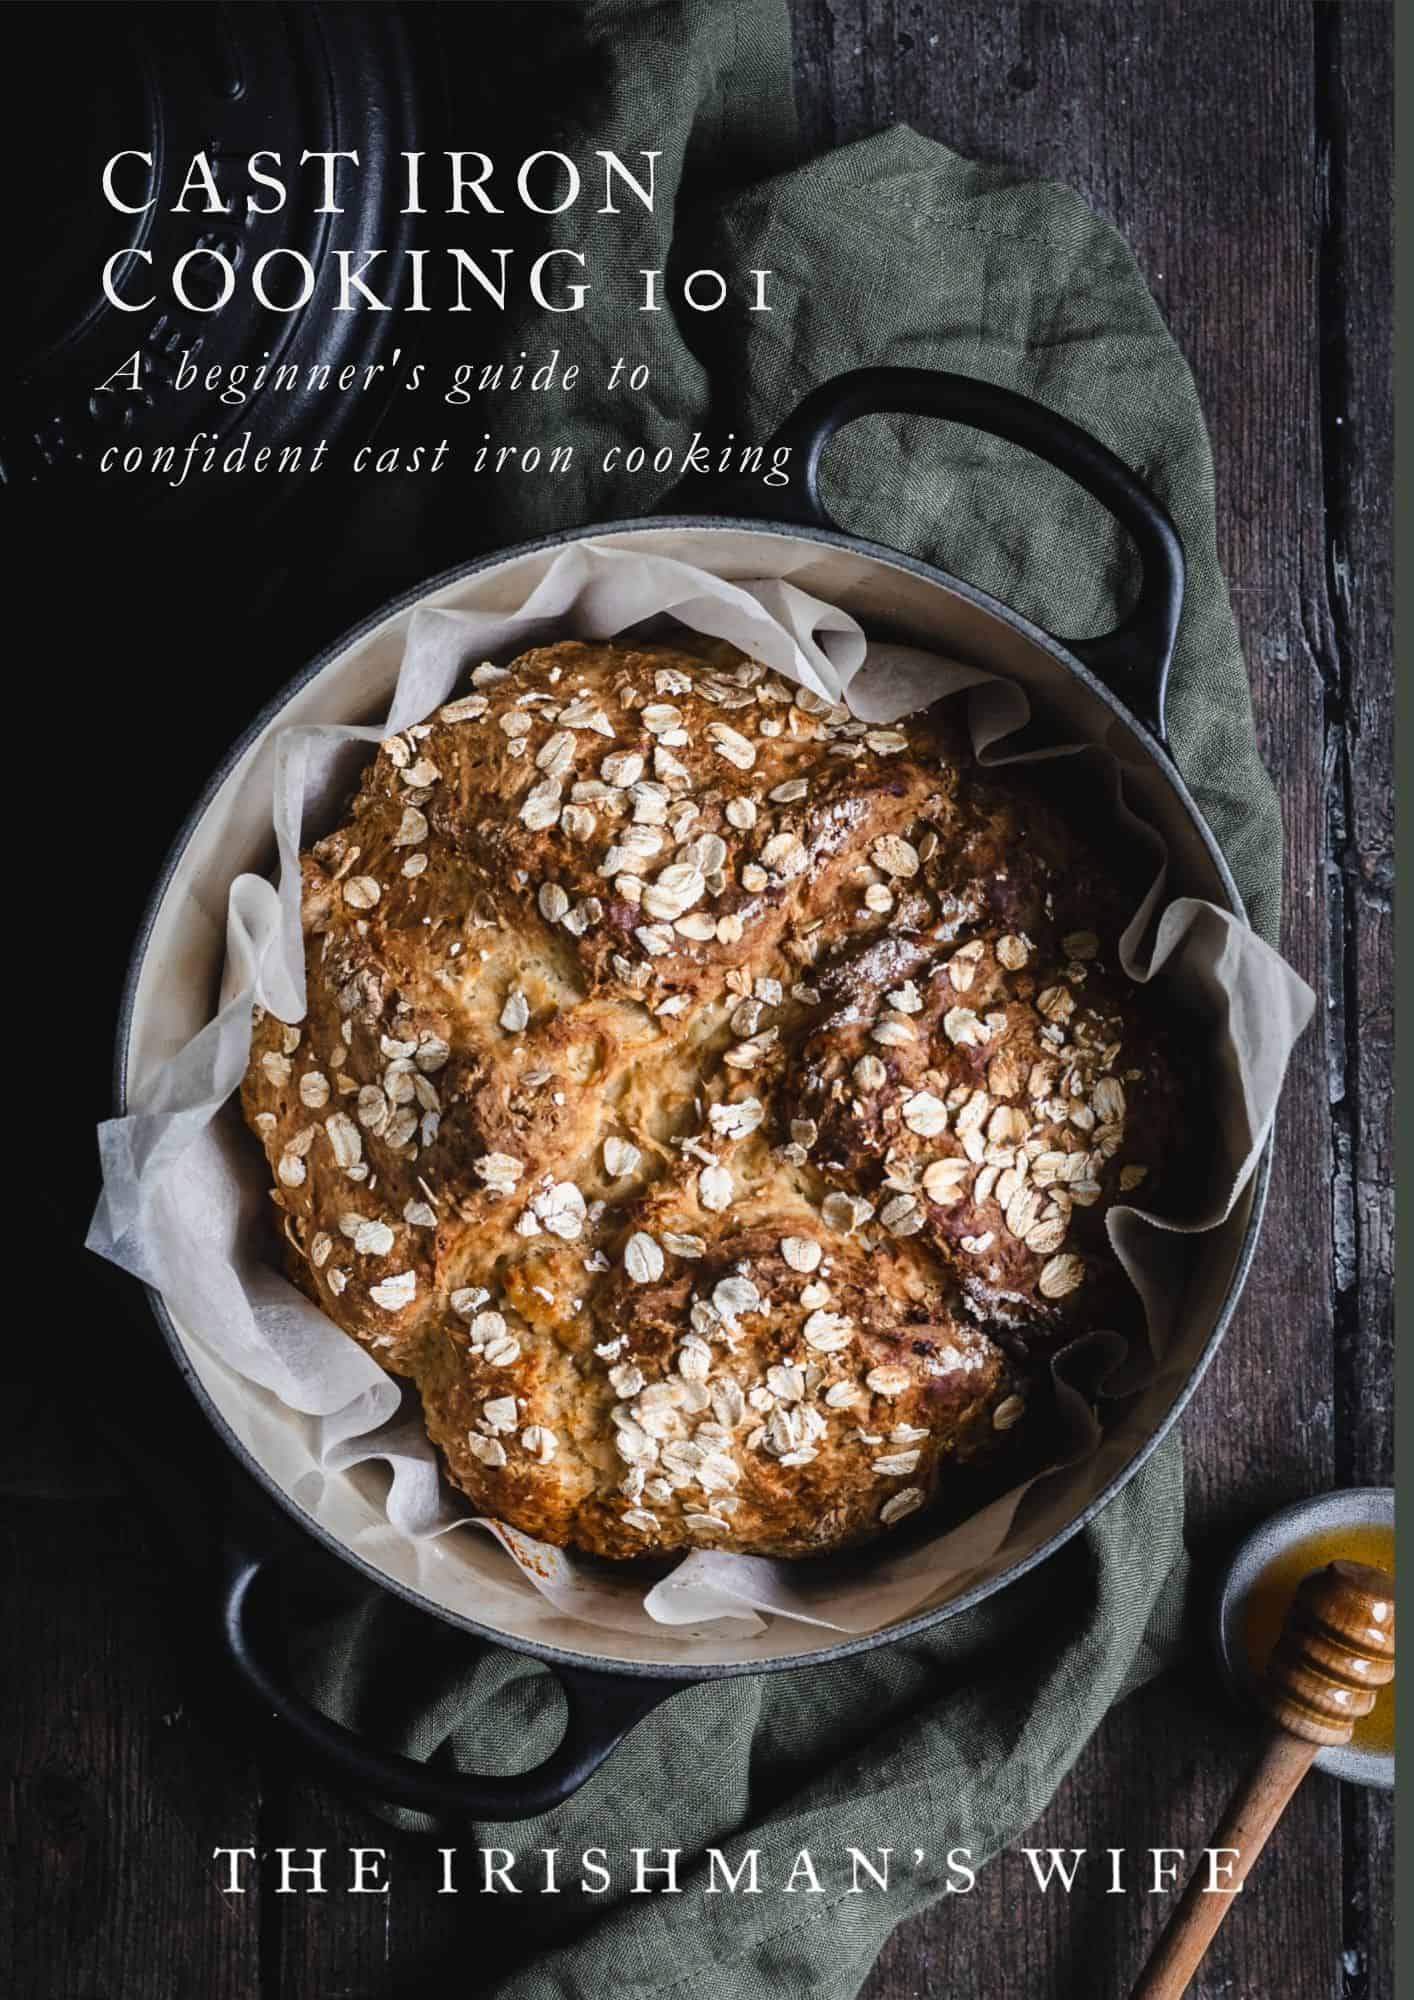
Cast Iron Cooking 101
From slow cooked stews to warm bread fresh from the oven, this guide will help you feel confident cooking with cast iron at home.
Easy Dutch Oven Bread (Hunter’s Bread!)
- Prep Time: 20 minutes
- Prooving Time: 10 hours
- Cook Time: 50 minutes
- Total Time: 11 hours 10 minutes
- Yield: 1 loaf 1x
- Category: Bread
- Method: Baking
- Cuisine: American
Description
There’s something homey about a loaf of freshly baked white bread. The golden crust, the light, fluffy interior, and that unmistakable aroma filling your kitchen—it’s hard to beat, isn’t it?! This easy Dutch oven bread is super easy, super delicious, and super great for lunchboxes – just ask Hunter!
Ingredients
- 600g bread flour
- 1 tbsp sea salt flakes
- 2 tbsp olive oil
- 1 tbsp instant yeast
- 450ml lukewarm water
Instructions
- In a stand mixer fitted with a large mixing bowl and a dough hook, combine flour, salt, olive oil, and instant yeast. Pour in the lukewarm water. Turn on the mixer to speed 2 to combine all the ingredients. Once everything has combined, reduce the speed to 1 and let the mixer knead the dough for 10 minutes.
- Cover the bowl with plastic wrap or a silicone lid and pop it into the fridge overnight to let the dough rise and ferment a little. The dough should double in size and look soft and jiggly on the surface.
- Remove the dough from the fridge. Lightly flour a clean work surface. Use a spatula or bench scraper to turn the dough out gently—try not to deflate it. Gently fold the edges of the dough underneath toward the center a few times to form a round ball. Transfer the shaped, cold dough ball to a piece of parchment paper. Pop it into an oiled Dutch oven to rise. Let it rest for roughly 2 hours in a warm place for it to come back to room temperature and rise again.
- Preheat the oven to 220°C/390°F. Cover with the lid and pop it into the oven. Bake covered for 30 minutes. Drop the temperature to 190°C/375°F, then remove the lid and continue baking for a further 20 minutes, or until the crust is deep golden brown and the loaf sounds hollow when tapped.
- Remove the bread from the Dutch oven and let it cool on a wire rack for at least 1 hour before slicing with a serrated knife. This helps the texture finish setting and makes slicing easier.
Notes
- Make sure the interior of your enamel cast iron pot is oiled to prevent thermal shock.
- Give the dough plenty of time to ferment. The flavor and texture both benefit. While you can cook this loaf after a first rise on the bench, and a second quick rise, the flavor is nowhere as good as it is on day 2 with an overnight rest in the fridge. I promise you, it’s worth it! I’ve even tried leaving for 2,3, and four nights resting, and while all had a similar rise, the flavor developed with each day.
- Avoid over-flouring: A sticky dough may seem awkward, but it leads to a moist crumb and airy loaf.
- Please note all recipes on this website are in US measurements. Eg, 1 cup / 240ml, 1 tablespoon/15mls. Oven temperatures refer to a fan-forced oven.
Nutrition
- Serving Size:
- Calories: 245
- Sugar: 0.2 g
- Sodium: 701.3 mg
- Fat: 3.9 g
- Carbohydrates: 44 g
- Protein: 7.7 g
- Cholesterol: 0 mg


Hello there! This is more of a question than a comment as I would like to try out this recipe. My question is, do you score the top of the loaf before you bake it? In looking at the picture it doesn’t appear to be scored.
Thanks!
Hi Jim
No I don’t score this loaf. Happy Baking! x
Hi Emma! Great website, the recipes look absolutely wonderful. I’m going to try them all.
In the meantime, I have a question to get started on the Hunter’s Bread.
I do not have a stand mixer, and as a senior, I can’t afford one. Can I mix it by hand? I imagine that will add a kneading time after a first rise, wouldn’t it? please advise. Keep up the awesome work you do. God bless.
Hi John
I haven’t mixed this by hand, but here’s what I would do… Instead of the mixer, mix together everything in a bowl, then tun onto a floured surface and knead by hand for roughly 8-10 minutes. Then continue the recipe as stated in the recipe card. I wouldn’t do a second knead after the first proof. I am however working on a no knead bread recipe at the moment so stay tuned! Merry Christmas! Emma x
This was my question as well, so I am looking forward to learning more about your no-mixer/hand kneaded loaf! Thanks!
Actually working on it today! Coming soon Brianna 🙂 x
5 stars, from Hunter!
Thanks Bestie! Don’t eat it all at once 🙂 xx