
An Irishman’s Wife’s Traditional Irish Soda Bread
I’m a soda bread girl from way back – even before I met my Irishman. Just after I finished school, a friend of mine had an Irish boyfriend who used to make the best weekend breakfast. A traditional Irish soda bread was always on the table along with bacon and eggs whenever a Sunday morning (post big night out) pick me up was in order!
This is my version. A little sweeter than some, but I just love a good dash of honey in my loaf. Enjoy!
I made this last night and it was absolutely delicious served up to me this morning for Valentine’s breakfast in bed with salty butter.
-Jo

If you’re new here, you might not know I also run a small online store where I keep many of the tools I cook with every day, along with a few timeless homewares for good, slow living…
So, what exactly is soda bread?
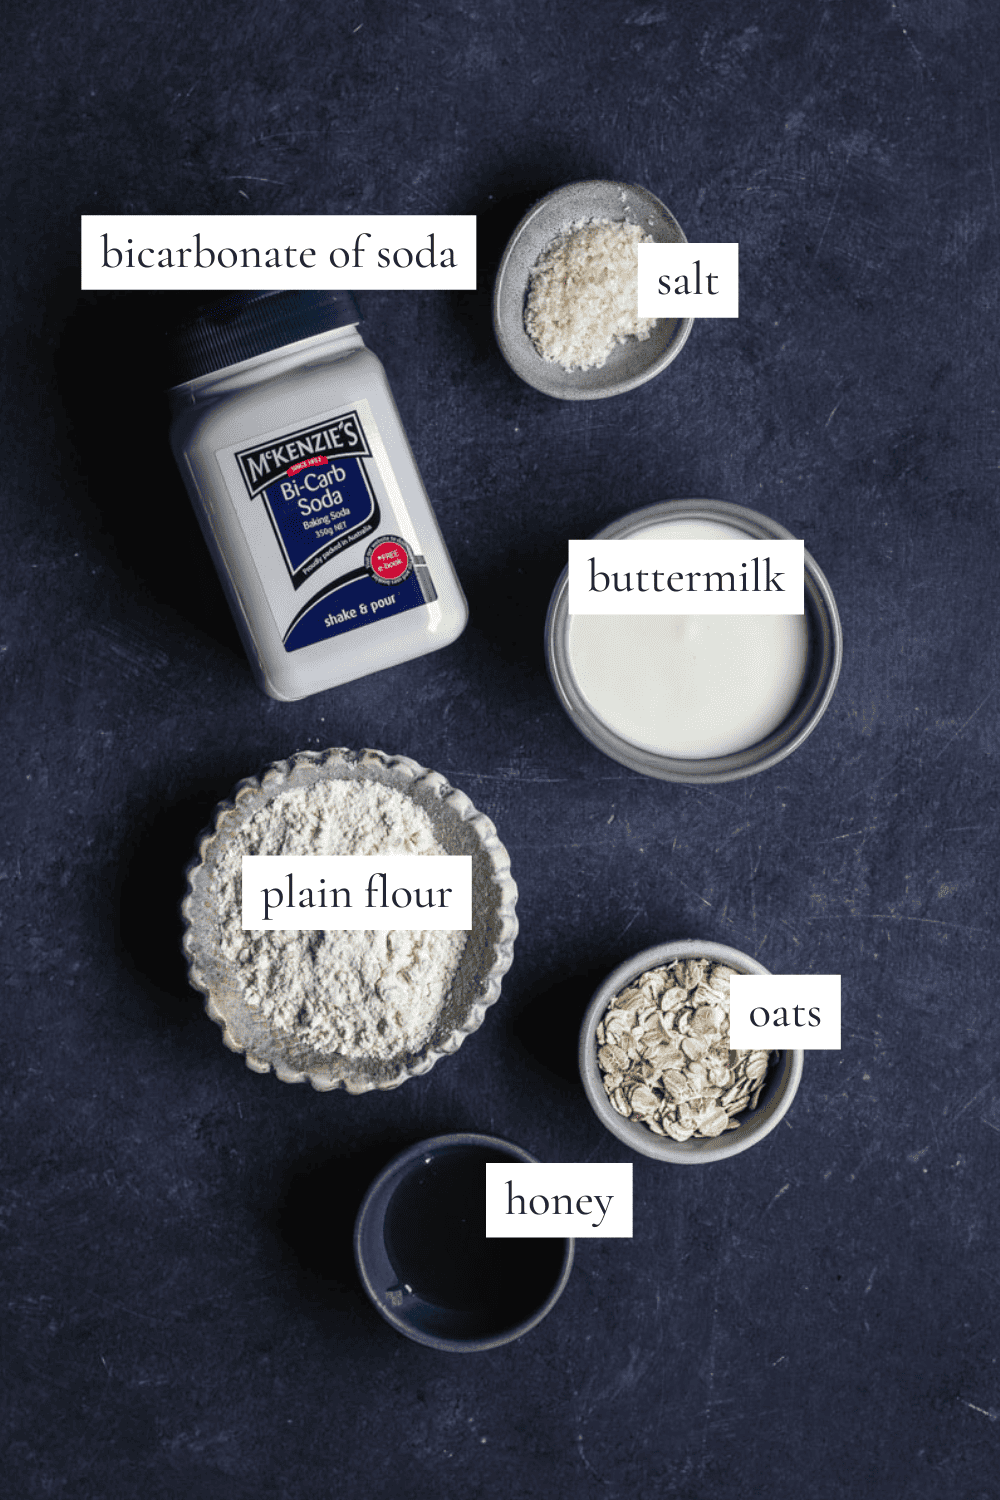
It’s literally the easiest bread of them all! No yeast, no kneading, no overnight proof. And four ingredients! Yes, you heard me correctly. FOUR INGREDIENTS! Traditional Irish soda bread is made with just four basic pantry staples:
- buttermilk
- flour
- baking soda
- salt
The buttermilk reacts with the baking soda to give the bread its rise, which is where soda bread gets its name. It’s a proper quick bread. Rustic, hearty, and designed to be made fast with pantry staples already on hand.
Unlike some American-style soda breads, traditional Irish soda bread generally isn’t sweet and doesn’t usually contain raisins or currants. Though honestly? You’ll find endless family variations depending on who’s baking and where they grew up. Some add oats, some use wholemeal flour, some throw in caraway seeds, and some would probably start an argument over whether sugar belongs in the dough at all.
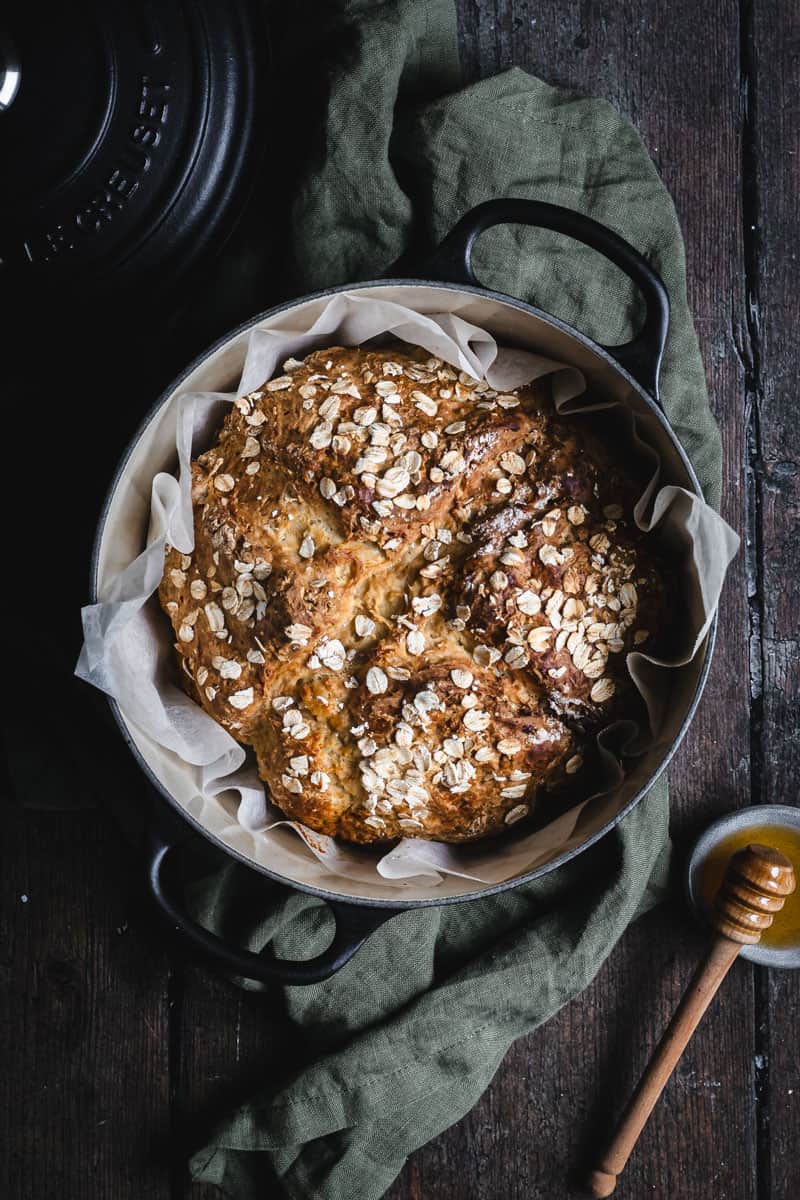
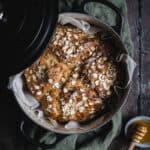
This version of mine sits somewhere between a traditional Irish soda bread and the slightly sweeter homemade loaves I’ve always loved. I add a little honey for warmth and flavor, and bake mine in enamel cast iron for a crusty golden loaf that feels right at home beside a bowl of stew or thickly spread with Irish butter for breakfast the next morning.
Why you are going to love this no-yeast soda bread recipe
You’ll have this no-yeast bread assembled, baked, and out of the oven in under an hour. I know, right? Who doesn’t love having an easy, quick bread recipe up their sleeve for those Sunday mornings when the pantry is bare? If yeast bread feels overwhelming and a little “too hard basket”, soda bread is the perfect place to start.
It’s a handful of pantry staples, simple ingredients. It’s rare that I can’t scramble together the ingredients for a loaf of bread with what I have on hand.
It makes the BEST toast on day 2! Pop a slice in the toaster and smother it with butter or this homemade fig jam. Also flipping delicious cheese toasties. I drool just thinking about them.
What you need to get started
- Plain, all-purpose flour. Don’t bother with bread flour for this one, you don’t need it. Regular plain flour will do the job.
- Sea salt flakes. I am a huge fan of Murray River Salt Flakes. It’s my go-to sea salt. Maldon salt is another favorite.
- Baking soda (bicarbonate of soda) – along with buttermilk, baking soda is the leavening agent to make this loaf of bread rise. Be sure that yours is in date before cooking!
- Runny Honey
- Buttermilk – if you don’t have buttermilk on hand, you can easily make your own by combining 1 cup of regular whole milk with 1 tbsp lemon juice in a measuring jug or small bowl. Leave for a couple of minutes until it curdles, and you’ve got buttermilk!
- Oats – I like to finish my soda bread loaves with a scatter of oats on top. It gives a little crunch to the top, and I just like it!
Variations
Where does one start? Dried raisins, currants, caraway seeds, and fresh herbs like rosemary are all small variations that will subtly change the flavor of the loaf without adjusting the core ingredients. Looking for a flavored version of this recipe? Check out my Bacon and cheddar soda bread recipe.
Want to cut down on the sweetness? While this is a savory bread, I love a little hint of sweetness. If you would prefer a less sweet version of this soda bread, cut down the honey to 1 tablespoon.
Wholemeal soda bread, anyone? Swap out the white flour for whole wheat flour instead. Or try a 50/50 combination with a mix of whole wheat and white flour. Please note you may need to adjust the amount of buttermilk if you do.
A Few Simple Steps…
- Mix the dry ingredients
- Add the buttermilk
- Shape the dough
- Score the top
- Brush with buttermilk, and bake until golden


Why Do You Cut a Cross on Soda Bread?
Make sure that you score the top of your loaf and don’t be shy about it! It isn’t just for looks! Why do we cut a cross on the top of soda bread? Firstly, soda bread cooks quite quickly compared to other breads, so the cross helps the loaf cook evenly by helping the heat reach the center of the loaf.
Also, the cross cut into the top of soda bread was said to “let the fairies out” and protect the household from bad luck. Very important business i’d say! Whether you believe the folklore or not, I still score the top of every loaf. It just feels wrong not to somehow.
Equipment
I bake my traditional soda bread in my Le Creuset 20cm cast iron casserole. It’s the perfect size for a small loaf of soda bread or sourdough. If you don’t have a small Dutch oven, a regular baking sheet or cast iron skillet will also do the job. I find I get a better crust on the base of the loaf by baking in cast iron cookware as opposed to a baking sheet, however, both will work. Cooking in a cast-iron pan without enamel? Here’s how to keep your cast iron seasoned and rust-free.
When baking in an enamel cast iron casserole, like Le Creuset, rub a little oil over the interior of the pot to stop it from getting thermal shock and damaging the enamel.
You’ll also need a large mixing bowl, measuring cups and spoons, and a wooden spoon. A small serrated knife, like a Victorinox steak knife, is my weapon of choice when I’m scoring the top of the soda bread dough.
Why I Bake Soda Bread in Cast Iron
I bake almost all of my bread in cast iron these days, and soda bread is no exception. I’m just a little obsessed with how a Dutch oven bakes bread. The crust. The color. The way the loaf rises. It gives even a simple soda bread that gorgeous rustic feel.
Cast iron holds heat beautifully, which helps create a deeply golden crust while still keeping the inside soft and tender. I usually bake mine in my small 20-22cm enamel cast iron casserole, which is perfect for soda bread.
While you can easily bake your soda bread on a baking sheet, if you already own enamel cast-iron cookware, this is such an easy, confidence-boosting loaf to start baking in it.
How to eat…
Slathered in lots of butter. Bonus points if it’s Irish butter. Kerry Gold is my go-to when I can get my hands on it! In Australia, most large supermarket chains stock KerryGold.
Alongside a warm pot of soup or a hearty Irish stew.
Make the BEST bacon and egg (or ham, cheese, and chutney) sandwich ever. Don’t forget to finish it by popping it on a griddle and toasting it a little on both sides. Yum!
With a little mixed berry jam or honey for your morning tea.
On the side of an Irish fry up for Sunday breakfast.
Still looking for more ideas? Here’s a roundup on different ways how to serve soda bread.
Storage
Soda Bread is best eaten on the day that it is baked. However, the next day (and the day after) I toast the bread for the BEST breakfast toast around. A loaf rarely lasts longer than a day or two in our house. But on the rare chance that it does, store it in an airtight container at room temperature.
You can also slice it, wrap individual slices in cling wrap, and freeze until needed.
FAQ’s

ENAMEL CAST IRON FAN?
If your idea of a good time involves a Dutch oven and a rainy afternoon, I think we’re going to get along just fine. Start with my Cast Iron Field Guide.
St Patrick’s Day is just around the corner…
- Easy Irish Buttermilk Scones
- Soda Farls
- Guinness Bread
- Boozy Baileys Chocolate Truffles
- Dutch Oven Corned Beef
- Irish Bacon & Cheese Soda Bread Scones
x
Start slow. Cook confidently.
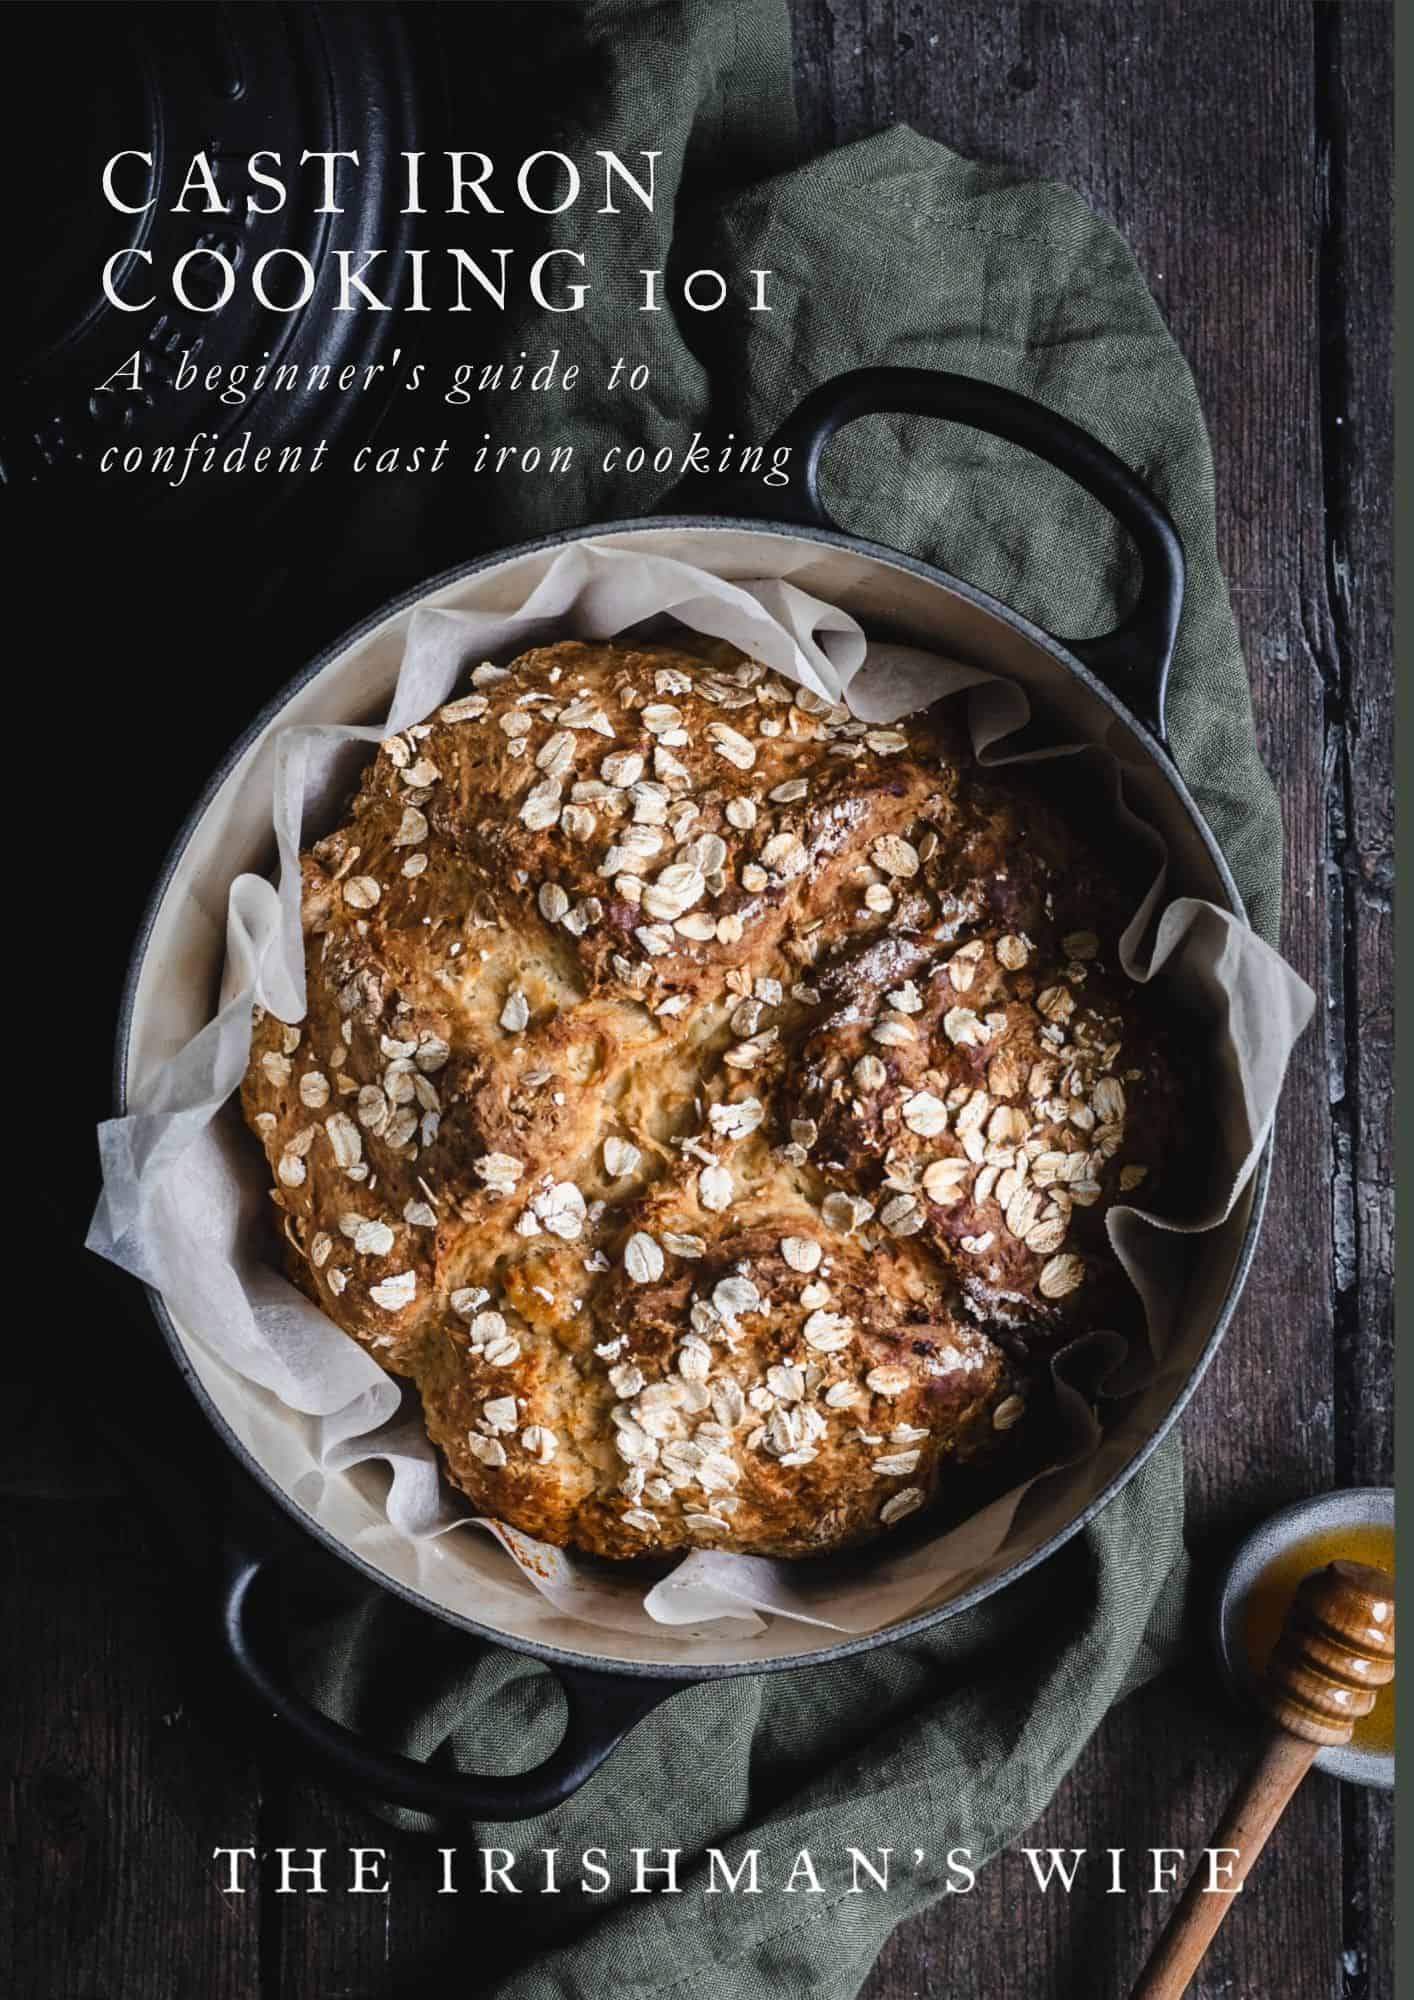
Cast Iron Cooking 101
From slow cooked stews to warm bread fresh from the oven, this guide will help you feel confident cooking with cast iron at home.
An Irishman’s Wife’s Traditional Irish Soda Bread
- Prep Time: 10 minutes
- Cook Time: 35 minutes
- Total Time: 45 minutes
- Yield: 1 loaf 1x
- Category: bread
- Method: Baking
- Cuisine: Irish
Description
This traditional Irish soda bread recipe is an easy, rustic loaf of bread that you can prep and bake in under an hour. Winner! Eat it warm slathered in cold Irish butter.
Ingredients
- 450g plain flour
- 2 tsp sea salt flakes
- 1 tsp bicarbonate soda
- 2 tbsp runny honey
- 360ml buttermilk
- 1 tbsp rolled oats
Instructions
- Preheat the oven to 200°c/390°f.
- In a large mixing bowl, combine all the dry ingredients. Give it a 10-second whisk to aerate the flour and break up any lumps before popping it aside.
- In a small bowl /measuring jug combine the honey and the buttermilk. Give it a good stir.
- Make well in the center of the dry ingredients. Add the buttermilk mixture to the mixing bowl with other ingredients. Using a large wooden spoon, Stir just to combine, but no more. The mixture should be a bit a little sticky, but not overly so. This is completely normal. Turn the dough out onto a well-floured surface and lightly form the dough into a ball with the top flattened a little. Soda bread dough should only just come together. It should not be kneaded.
- Place the dough on a floured piece of baking paper.
- Using a sharp knife (serrated works a charm), score the top of the loaf with a cross about 1/3 of the loaf deep.
- If you have any remnants of the buttermilk in the jug, brush it on top of the loaf. Scatter the top of the bread with rolled oats.
- Lift the soda bread (by the paper) into a small, oiled Dutch oven (without the lid) and pop into the preheated oven. Bake for 35 minutes or until golden and the loaf sounds hollow when tapped on the base.
- Leave to cool on a wire rack or wrapped in a cloth tea towel.
Notes
Make sure that you score the top of your loaf. Why do we cut a cross in the top of soda bread? Not only will it help the loaf cook evenly it also lets the fairies out! Very important!
To Store… Soda Bread is best eaten on the day that it is baked. However, the next day (and day after) I toast the bread for the BEST breakfast toast around. A loaf rarely lasts longer than a day or two in our house. But on the rare chance that it does, store in an airtight container at room temperature. You can also slice it, wrap individual slices in cling wrap, and freeze until needed.
While soda bread is best eaten on the day it is made you can store any leftovers for up to 3 days in an airtight container.
I bake this recipe in a 20cm/22cm enamel dutch oven.
Please note that all recipes on this website are in US measurements. Eg, 1 cup / 240ml, 1 tablespoon/15mls. Oven temperatures refer to a fan-forced oven.
Nutrition
- Serving Size: 1/8 loaf
- Calories: 243
- Sugar: 4.6 g
- Sodium: 788.9 mg
- Fat: 2.1 g
- Carbohydrates: 47.5 g
- Protein: 7.3 g
- Cholesterol: 5.1 mg


I made this last night and it was absolutely delicious served up to me this morning for Valentine’s breakfast in bed with salty butter. Not quite as delicious as the dog found it, when he pulled it off the bench later this morning and had chewed half of the top off before I caught him.
Now the chooks are enjoying it 😭
Oh no! Well maybe we can look on the bright side, you did at least get one slice! I hope your dog and chooks enjoyed it 😉 Ps, so happy you liked the recipe x
Hi Emma,
Am baking this this morning; your photo appears to have the lid in the shot, but you don’t specify if the baking is done in an open dutch oven or lidded.
Please advise,
Thanks for your expertise and time!
Carl
Hi Carl. No lid should be put on for baking soda bread. Thanks for following up, Emma x
Thanks Emma!
Carl
Hi Emma and thank you for your recipe which saved my sanity stopping me from being sanctioned to a sanatorium for the severe deranged amateur bakers.
Fed up with the rubbish bread from the supermarkets my New Year`s decision was to bake sourdough bread although I`ve never baked before. After several kilos of wasted flour and pounds of dried yeast and bread harder than the bricks of my house I ended up with sticky dough all over my kitchen, hands and clothes and with shattered nerves and frothy mouth.
So I thought the answer was to drop the yeast and as I had heard of Irish soda bread before I found your recipe and low and behold a miracle happened there and then and I dropped on my knees as an apparition of the last supper with Him breaking bread appeared in front of my eyes and my trembling hand got my soda loaf from the skillet and it had risen!, Hallelujah!!,
Thank you Emma, now I hate yeast and love soda, do you know why yeast bread rises?, it is because the microorganisms of the yeast eat the sugar and pass wind, that is why there are empty holes in the bread, they are a lot of arsholes, fancy people eating that…..it doesn`t happen with soda bread.
Carlos
Hi Carlos. Thank you for your lovely comment! It gave me a good laugh – just what I needed as I’ve been home sick for the last two days. Don’t give up on sourdough just yet. It really is a learning process, but once you get it, its the best! I have a post on how to create a sourdough starter. Making your own from scratch changes everything. I highly recommend it! Also, Welcome to the soda bread club 🙂 Emma x
Hi Emma,
thanks to your encouragement and my success with your soda bread and after a few glasses of brandy I will try your sourdough starter recipe.
I took recipes of my disastrous sourdough bread making from youtube, the majority advocate that after doing the series of folds the dough should be placed in the fridge for 8-14 hours.
The only time I thought I`d succeed because after the folds the dough did rise to double its size, I think that I killed it by doing precisely what they asked me, put it in the fridge and again a brick emerged from the oven.
Do you think I could bypass that step and if the dough rises well after the last fold I should put it straight in the oven?. To me it doesn`t make any sense to cool down the yeast when you need it most before the oven. Could it be that after the fridge I should have waited a few hours for it to rise again before the oven?, and if so what is the purpose to be in the fridge for so long? Please help.
Also when I baked my last sourdough brick I lined my skillet with baking paper and after baking it the paper became part of the bread crust and no way could have been peeled from the bottom and sides so I lost all that crust because I think the only way to learn is to eat your own baking however it turns out, paper or no paper.
I always heard that “Irishmen`s wives” make excellent wives but I didn`t know no man can find one because they are already married, so how did it all start?……….Carlos
Hi Carlos
Yes you should definitely give sourdough another try! Before you start, check out Elaine Boddy’s Sourdough blog. She makes everything so much easier and I really recommend her. I do put my sourdough in the fridge, however I also let it come to room temperature before baking. However, I have friends who bake straight out of the fridge too. It really depends on your recipe. Personally I love the fridge method because it allows me to make multiple batches the dough and cook them over a few days – it saves so much time. Next time you are baking bread, make sure your baking paper is floured before popping the dough on. This will hep with the sticking. Mastering sourdough takes time. Its a process and one I didn’t get right for ages. Not every recipe/method will suit you. You need to find what works for you and your lifestyle. I tried getting into sourdough about 4 times over a few years before I found my groove. You’ll get there!
As to me and my Irishman, I was a cook way before I met him, and he’s just lucky he found me 😉
Best recipe comment ever.
Please check the amount of buttermilk…360 ml is 3 cups…twice the amount of any other recipe for this bread…it was runny! I had to add lots more flour, salt, and soda…it was still rather moist, so it took a long time to get completely baked in the center…I make sourdough, weekly, and never have a problem…please advise
Hi Linda. I don’t know what measurements you are using, I use US which 360ml is roughly 1.5 cups of liquid, not 3 cups. This is a sticky dough (but not runny) and nothing like a sourdough dough. Soda bread recipes always have a significant amount of liquid compared to flour, much, much more than a sourdough recipe. Hope this helps, Emma x
Linda is right! I followed your recipe exactly as posted and did the conversions of the measurements (with a little help from Google) exactly. My dough was a runny paste. I ended up adding a half cup of flour and still not “sticky”, could not form a ball or cut the cross into the top 1/3. I baked in oven in cast iron for 25 minutes, if I had let it go 35 minutes I would have had a charcoal briquette.Inspite of the “difficulties” it did turn out OK.
Hi Harold. Just to make sure I haven’t posted the recipe incorrectly I have made it again this morning. It worked perfectly so I’m unsure as to why you and Linda are not getting the same results. The only thing I can think of is that you both used an online tool to convert measurements. When I’m baking (and posting recipes) I generally use ml/gm as opposed to cups as you can get a varied result and grams is much more accurate than cups. Aside a pinch of flour to dust the bench surface, that is all the additional flour I add. Hope this helps x
360ml is about 1.5 cups, not 3 cups. Not sure what you used for your conversion but that’s the reason for your runny dough.
Hi again Emma, having plucked up courage to tackle sourdough bread I`m realizing that if one lives in coldish climate it is an uphill struggle to make a starter because it has to be kept for 7 + days at a warm steady temperature and in North England that is a joke
I will welcome any advice to achieve that without spending a fortune in energy. Here is the way I`m doing it at the moment. I use a slow cooker and I set it at lowest temperature, it consumes about 100 watt per hour, I fill the pot with lukewarm water to the level of the starter, I put the starter container in the water and I put the lid on, even at that setting the temperature rises over 35 C, so it will kill the starter, to avoid it I plug the cooker into the mains using an old fashion timer (an analogue one, not digital). this has a dial with 96 segments each lasting 15 minutes which can be turned on and off at will for a period of 24 hours. By trial and error I found that if in the hour I put one segment on and 3 off the temperature in the water is kept reasonably warm during the day. At night I increase it to1/2 on 1/2 off every alternating hour to achieve steady temp.
If you know of any other gadget available to a baker to keep temperature steady I`d appreciate it, a neighbour suggested a piece of thick copper wire, a screw driver, wellington boots and insulated pliers………to bypass the electric meter!!!!.
Hi Carlos. Have you thought about a seedling warming tray? I’ve heard that in really cold temperatures it’s a great way to keep steady temperature. 🙂
I have several recipes and have been researching online and every receipe is so different.
Do I brush the outside with butter, butter and more buttermilk? Do I top it with oats or coarse sugar?
Should the dough have melted, softened or cut in cold butter? Maybe no butter.
I like caraway and currants, but…
I think I’m just going to buy a loaf.
Thanks though.