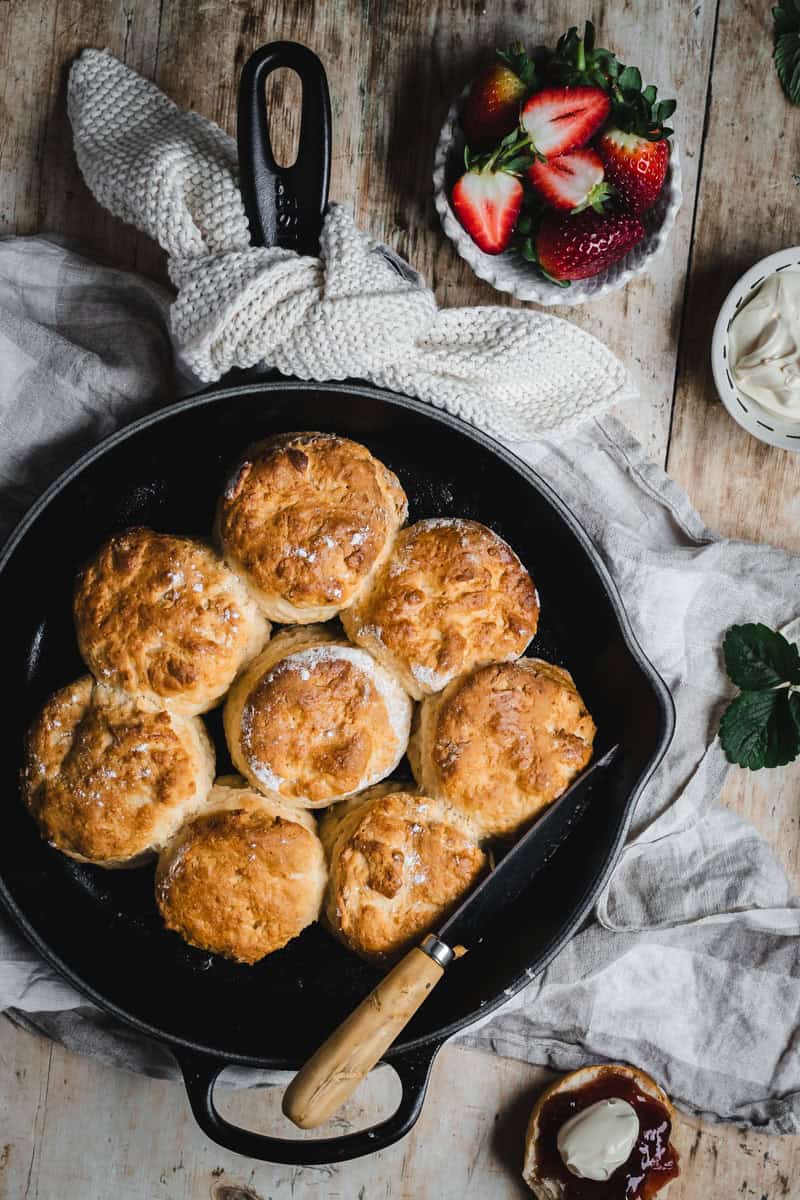
Super Easy Lemonade Scones – The Fluffiest Aussie Scones!
These super-easy lemonade scones are one of those recipes that you just keep coming back to. We’re talking five ingredients and whipped up so you can eat warm scones straight off the skillet in under 45 minutes, obviously, slathered in jam and cream. Winner!
If you’re new here, you might not know I also run a small online store where I keep many of the tools I cook with every day, along with a few timeless homewares for good, slow living…
Scones are always a good idea! I’ve been cooking them since I was a kid. I’m not fussy… I’ll try them all. Buttermilk scones, choc chip, lemon, or even soda bread scones are always a good idea. But of all the scone recipes out there, these lemonade scones are definitely up there with being the tastiest lemonade scones around.
Most Australian towns and cities host their own show every year. Whether it’s our little village in the Central West or the Sydney Royal Easter Show, you’ll never visit one without seeing trestle tables lined with the fluffiest scones with jam and cream. It’s an iconic part of rural Australia – you’re crazy if you try to skip past one, just surrender to it and enjoy a scone or two! The Country Women’s Association (or CWA) has long been behind the best scones in the biz. They’re light, fluffy, and the daintiest scones you’ll ever taste. This lemonade scone recipe is my little homage to these with my own twist!
What are Lemonade Scones?
Lemonade scones are an Australian baking classic made with just a handful of simple ingredients. Instead of rubbing butter into flour like a traditional scone recipe, lemonade and cream do all the heavy lifting, creating incredibly light and fluffy scones with very little effort.
Despite the name, they don’t actually taste like lemonade. The fizzy lemonade helps create a soft texture and impressive rise, while the cream keeps the scones rich and tender.
They’re a favourite at country shows, CWA bake stalls, and afternoon teas all over Australia, usually served warm with jam and cream.
Why You’ll Love This Recipe
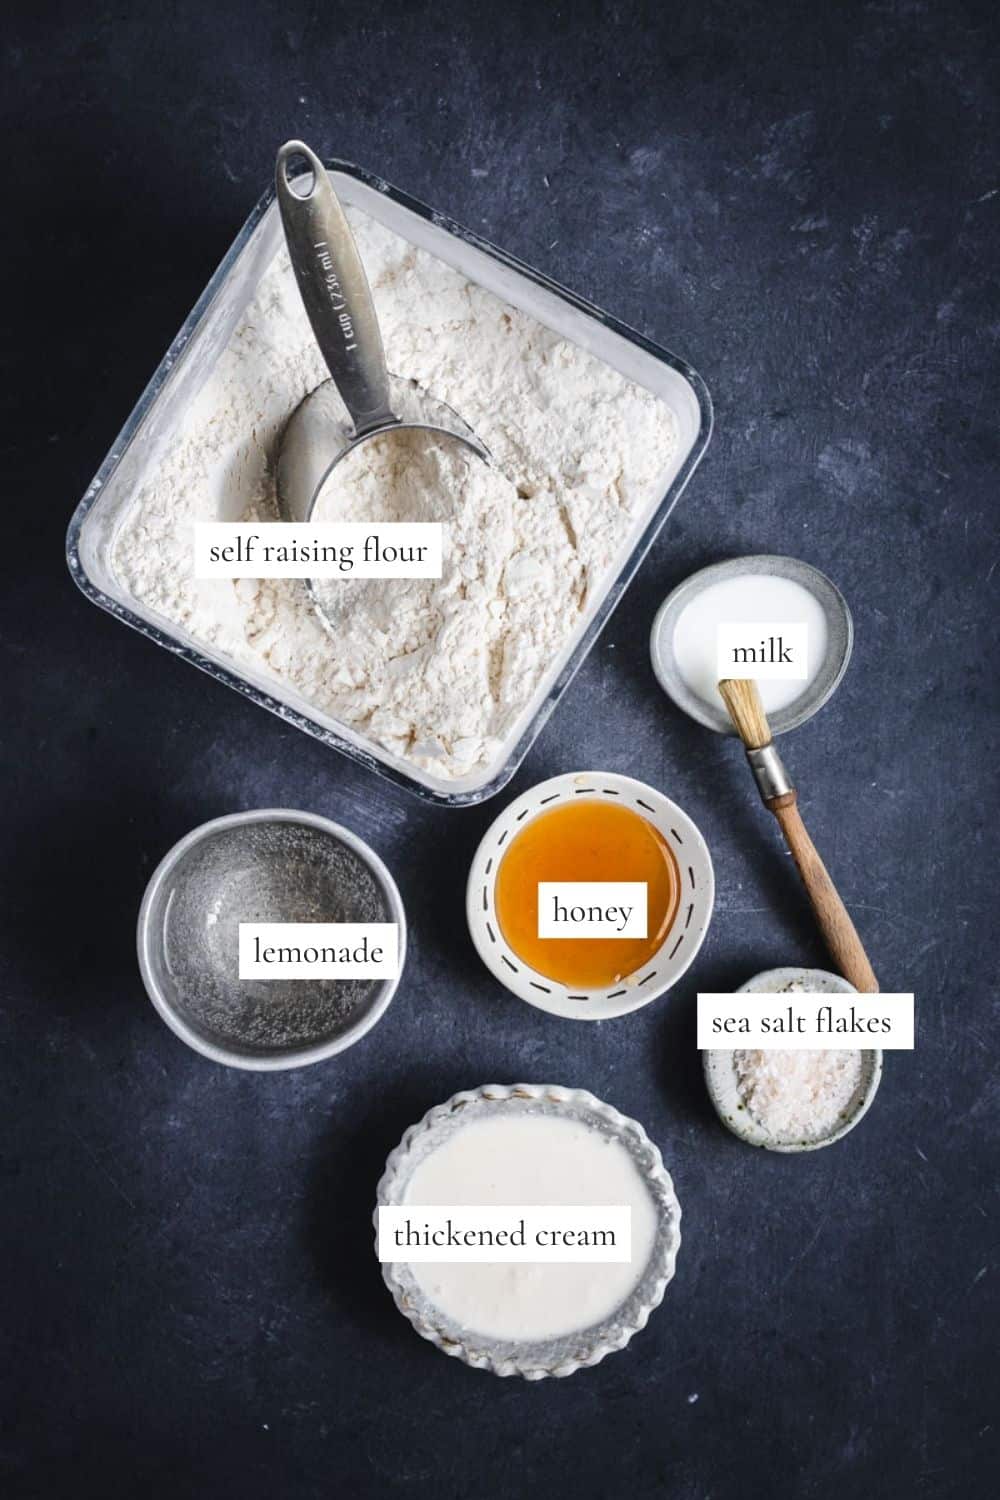
You only need a handful of ingredients to whip up a batch. Five in fact! Self-raising flour, lemonade, honey, salt, and thickened cream.
We’re talking a super quick recipe. 10 minutes of hands-on time and another 20 minutes in the oven. An after-school treat doesn’t get any better than that.
Fail-safe & forgiving — I’ve tested four different lemonades… Sprite, Kirks, Schwepps, 7-Up, and all worked perfectly!
They’re light, fluffy, and tall – no dense, rock cake scones here!
Ingredients
- Self-raising flour. You can diy self-raising flour if you don’t have any by combining 2 tsp of baking powder for every cup of plain, all-purpose flour.
- Lemonade. I’m talking about the store-bought, regular, fizzy lemonade like Sprite (and not homemade lemonade). While you can use a diet version, I found it’s a slightly different result. Stick to the full sugar version!
- Thickened cream (or heavy cream if you’re not in Australia). Cream replaces cold butter in a regular scone recipe like these buttermilk scones.
- Runny honey – because I like a sweeter scone, I add a little honey.
- Sea salt flakes. Murray River or Maldon are my go-tos
- Full cream milk for brushing the tops of the scones
Variations
Where does one start! A simple scone recipe like this one can be made into so many variations with an addition or two. Some grated gruyère cheese and bacon would make the most delicious bacon and cheese scones. As would a handful of dark chocolate chips to the scone dough for chocolate chip scones. Here are some of my favorite variations to try…
Sweet Variations
- Chocolate chip lemonade scones
- Blueberry lemonade scones
- Lemon and poppy seed scones
- Raisin scones
- Lavender and honey scones
Savoury Variations
- Bacon and cheese scones
- Gruyère and chive scones
- Ham and cheese scones
- Sundried tomato and parmesan scones
Simply fold your chosen additions through the dough before cutting out the scones.
Step-by-Step Instructions
- Preheat the oven and butter the skillet.
- Make the dough.
- Shape your scone dough and cut your scones.
- Pop your scones into a skillet and bake until golden brown.
- Cool and transfer to a baking rack.


Cooks notes
Here is the most important thing to remember when making scones…To get light, high and fluffy scones, don’t twist the scone cutter when you’re cutting the scones. Twisting crushes the buttery dough layers and stops them from evenly rising.
Also, Make sure that you place scones close together so they climb, not spread. Plus they have that fluffy center thing going when they’re pulled apart.
Why Does Lemonade Work In Scones?
The secret to fluffy lemonade scones comes down to two things: carbonation and sugar. The fizzy bubbles in lemonade help create a lighter texture, while the sugar adds a touch of sweetness and helps the scones brown beautifully in the oven. Combined with cream (which replaces the butter traditionally rubbed into scone dough), the lemonade helps create a super simple dough that creates tall, soft scones with very little effort every time. If scones have left you scarred in the past, this one’s for you.
And before you ask, no, they don’t actually taste like lemonade! The flavour disappears during baking, leaving behind a light, fluffy scone that’s perfect for jam and cream.
My Everyday Skillet
If you only need one skillet in your life, this is it. My 26cm skillet handles everything from morning eggs to steak dinners and cozy fruit cobblers. Big enough for a family meal, but light enough to grab every single day.
Equipment
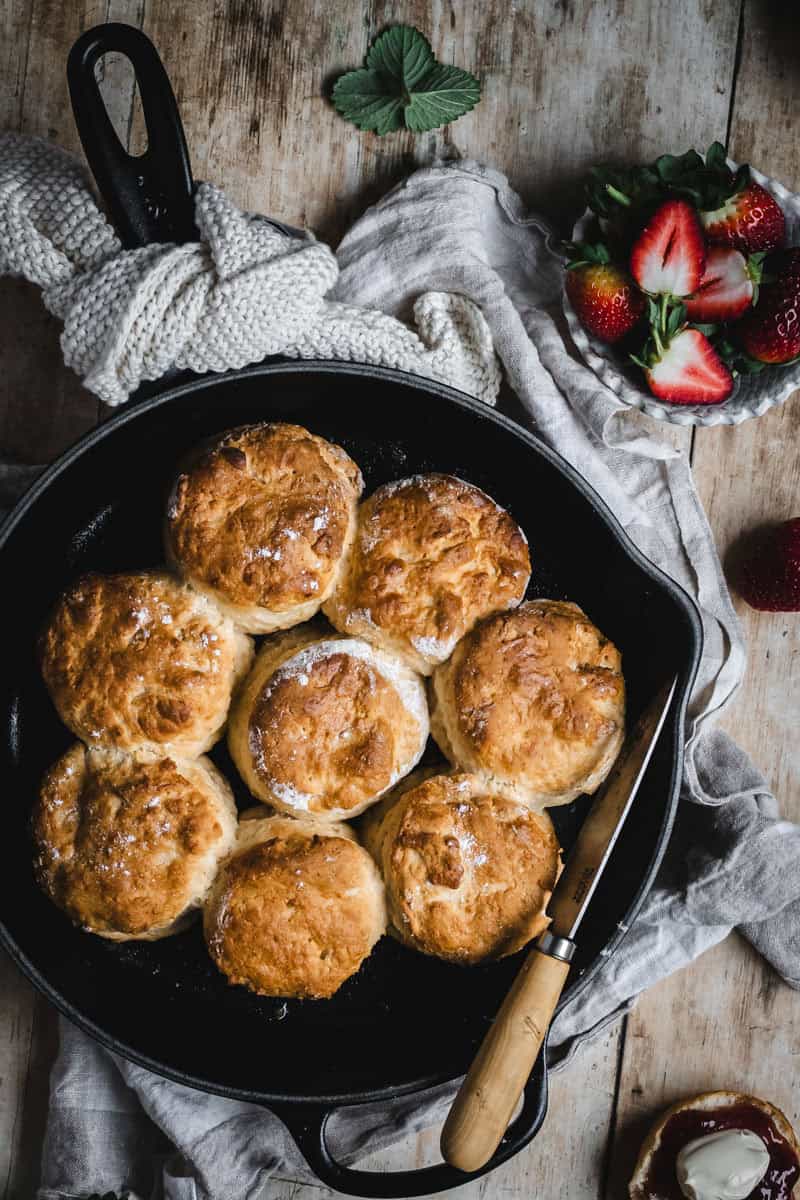
I cook this lemonade scone recipe in my 26cm enamel cast-iron skillet. I just love the way cast iron cooks quick breads. It gives the best rise and a gorgeous golden crust. You’ll need to cook in two batches as each batch makes (and fits in a skillet) 8 homemade scones. Before baking, butter your skillet to prevent your scones from sticking to the base. If you don’t have a skillet, a greased, flat oven tray will still do the job.
A pastry cutter approximately 5-6cm wide for cutting the scones is my go-to size for these scones. These are what I’d call “single serve” scones. If you’re after something a little smaller, suitable for a baby shower or tea party, a 4cm scone cutter may be more suitable. If you don’t have a scone cutter, I used a thin-rimmed, straight-sided glass for ages. I once catered for a party and cut out all of my scones with a shot glass! Whatever works, huh!
You’ll also need a large bowl, a pastry brush, and measuring tools.
Why Bake Lemonade Scones In A Cast Iron Skillet?
While lemonade scones can be baked on a regular baking tray, I love making them in a cast-iron skillet.
Cast iron holds heat beautifully and creates a perfect baking environment, helping the scones rise tall while developing a golden crust on the top and bottom. The best part is the way the scones nestle together in the skillet as they bake. As they rise, they support each other, creating those soft, fluffy sides that pull apart beautifully when served warm – they’re the best bits!
If you’re new to baking in cast iron, this is one of the easiest recipes to start with.
Let’s serve them up!
A warm lemonade scone fresh from the oven doesn’t need much, but there are a few classic pairings that never disappoint.
The Traditional Favourite
The classic strawberry jam + softly whipped cream + a pot of tea never gets old. It’s a staple for good reason. Wanna go wild? Try this three-berry jam instead!
For Something A Little Different
Homemade lemon and passionfruit curd with a dollop of mascarpone or double cream is another no-fail option.
A Country-Style Favourite
Sophie Hansen’s Quince Butter from her book “A Basket by the Door” is dreamy with scones and makes a nice swap from traditional jam and cream

ENAMEL CAST IRON FAN?
If your idea of a good time involves a Dutch oven and a rainy afternoon…I think we’re going to get along just fine. Start with my Cast Iron Field Guide.
FAQ’s
Storage
Scones are always best eaten warm on the day that they are cooked. If you have leftovers, store them in an airtight container for up to two days. Refresh any day-old scones by popping them in the microwave for 10 seconds.
If you’re in a pinch, you can freeze baked scones for up to two months to eat later. When you’re ready to eat, remove them from the freezer and let them come to room temperature before reheating them in the oven for a few minutes.
Here are a few more Aussie recipes you might like…
- The Juiciest Beef Sausage Rolls
- Aussie Cheese and Bacon Rolls
- Dutch Oven Damper
- Beef Rissoles Recipe
Well, that’s it, these are the easiest scones you’ll ever make and are so delicious any day of the year. It’s really just the question of is it jam then cream or is it cream then jam?!.
Happy Baking!
x
Start slow. Cook confidently.
Cast Iron Cooking 101
From slow cooked stews to warm bread fresh from the oven, this guide will help you feel confident cooking with cast iron at home.

Super Easy Lemonade Scones
- Prep Time: 10 minutes
- Cook Time: 20 minutes
- Total Time: 30 minutes
- Yield: 16 scones 1x
- Category: Sweets
- Method: Baking
- Cuisine: Australian
Description
Fluffy, tall lemonade scones baked in a cast-iron skillet! These super-easy, five-ingredient scones come together in minutes and are ready to eat warm, straight from the pan, in half an hour. Slather them with jam and cream for the ultimate afternoon treat.
Ingredients
- 4 ½ c / 745g self raising flour
- ½ tsp sea salt flakes
- 1 ½ c / 360ml lemonade
- 1 c /240ml thickened cream
- 2 tbsp runny honey
- Full cream milk (to brush scones with)
Instructions
- Preheat the oven to 200°C / 392°F. Butter the inside of your skillet and set it aside.
- Pop the flour into a large bowl, add the salt, and give it a quick whisk to aerate the flour.
- In a jug, combine the lemonade, thickened cream, and runny honey — just stir gently to combine. Pour the wet mixture into the dry ingredients and fold everything together until just combined. The dough should be slightly sticky, and a bit shaggy, so resist the urge to overwork it.
- Turn the dough out onto a lightly floured surface and gently pat it into a thick disk about 2.5 – 3 cm (1 inch) thick. Cut rounds with a floured 5-6 cm cutter
- Arrange the scones close together on your skillet and brush the top of each scone with a little milk. Bake for 20 minutes until they’re risen and lightly golden. Cool on a rack for five minutes, then serve warm with jam and cream… or just eat one straight up while no one’s watching.
Notes
To get light, high, and fluffy scones, don’t twist the scone cutter when you’re cutting the scones. Twisting crushes the buttery dough layers and stops them from evenly rising.
Make sure that you place scones close together in the skillet so they climb, not spread. Plus, they have that fluffy center thing going when they’re pulled apart.
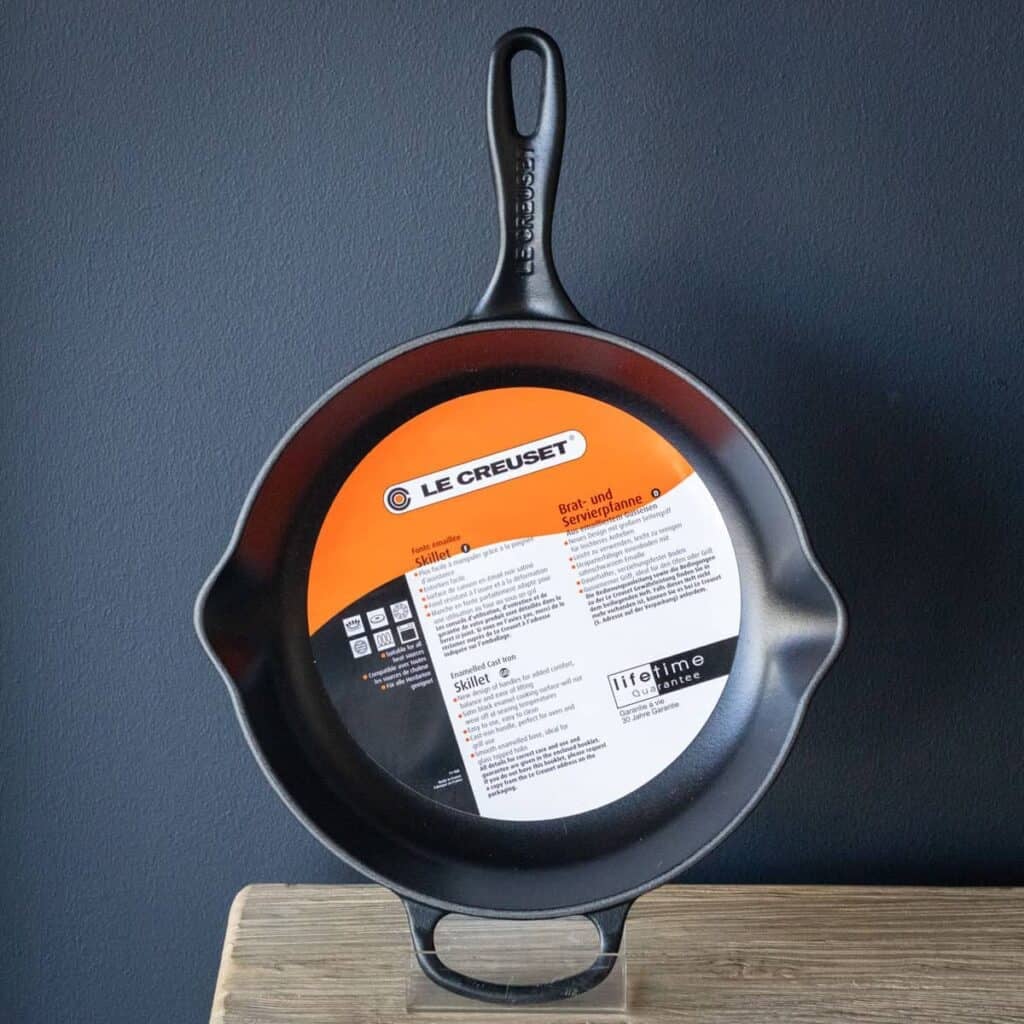
This recipe was cooked in my Le Creuset 26cm cast iron skillet.
Scones are best eaten on the day they are baked. However, if you have leftovers, store them in an airtight container for up to 2 days. To freshen them up the next day, pop them in the microwave for 10 seconds.
Ps. Please note all recipes on this website are in US measurements. Eg, 1 cup / 240ml, 1 tablespoon/15mls. Oven temperatures refer to a fan-forced oven.
Nutrition
- Serving Size:
- Calories: 213
- Sugar: 14.8 g
- Sodium: 497.3 mg
- Fat: 3.3 g
- Carbohydrates: 42.3 g
- Protein: 3.8 g
- Cholesterol: 8.8 mg