
Pressure Cooker Dulce De Leche – FYI It’s Super Easy!
Looking for a delicious homemade caramel sauce to drizzle over your desserts and take them up a notch? Look no further, I’m going to show you how to make the easiest sweet dessert sauce around. Say hello to pressure cooker dulce de leche!
If you’re new here, you might not know I also run a small online store where I keep many of the tools I cook with every day, along with a few timeless homewares for good, slow living…
So what is dulce de leche you ask?
Firstly, it’s a super easy recipe. Think of a delightful, sweet caramel sauce made by caramelizing condensed milk over a long period of time. While most known in Latin America as desserts and sweets, it’s really become popular worldwide and more readily available over the last few years. Try it spread over a croissant or use it to sandwich cookies together—get on board, you won’t regret it!
What you need to get started
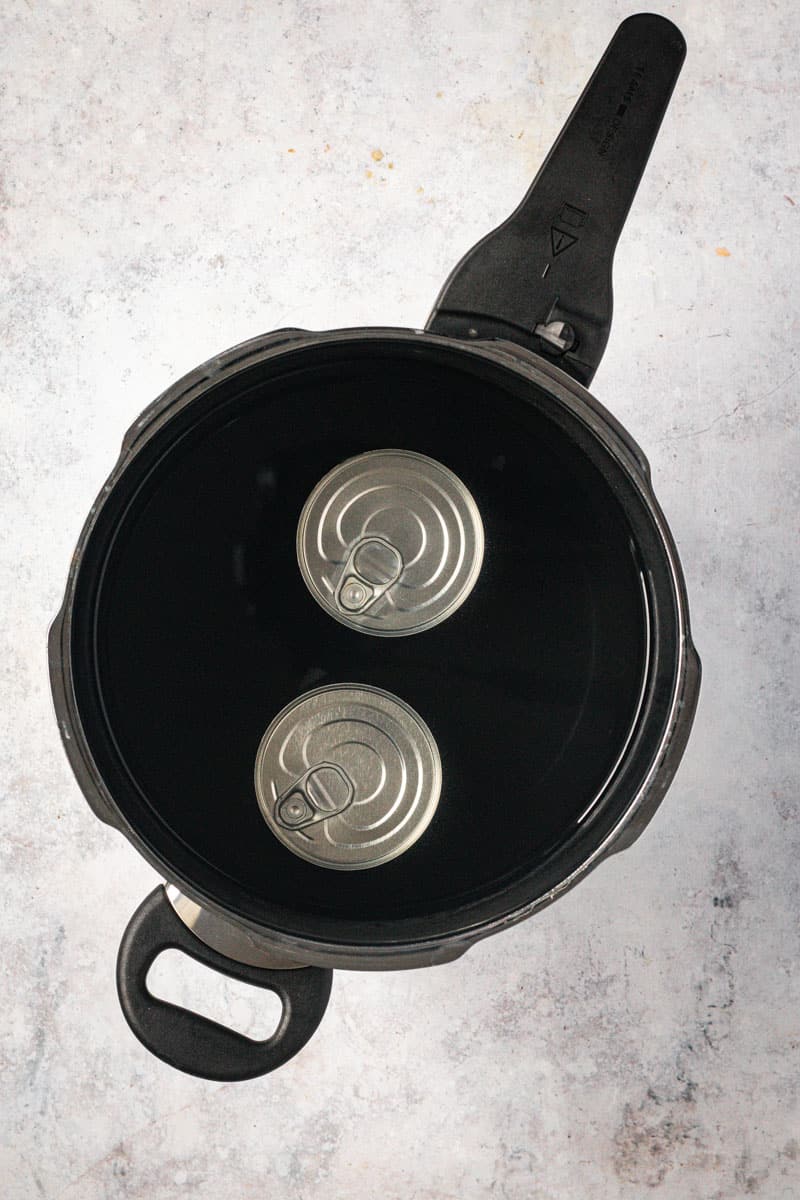
- A can (or cans) of sweetened condensed milk. I always pressure cook at least two cans of condensed milk at a time. First, because most of my recipes require more than one can, and second, in case anything goes wrong with one can, at least I have a spare! In Australia, Nestle is the most common brand of dulce de leche at the grocery store, however I’ve tried multiple brands and I get a similar end result.
- Pressure cooker. I have a Silit 6.5L pressure cooker that can hold up to 5 cans at a time.
The nitty gritty
- Remove the paper label from the cans of condensed milk.
- Place the unopened can (or cans) into the pressure cooker. Cover with at least 2-3 cm of cold water. In my pressure cooker, the water level is the maximum fill line.
- Secure the pressure cooker lid and place on the stove on a high heat. Bring the pot to high pressure and maintain for 30 minutes.
- Turn off the heat and leave to naturally depressurize.
- Pop aside and leave overnight until the water is at room temperature.
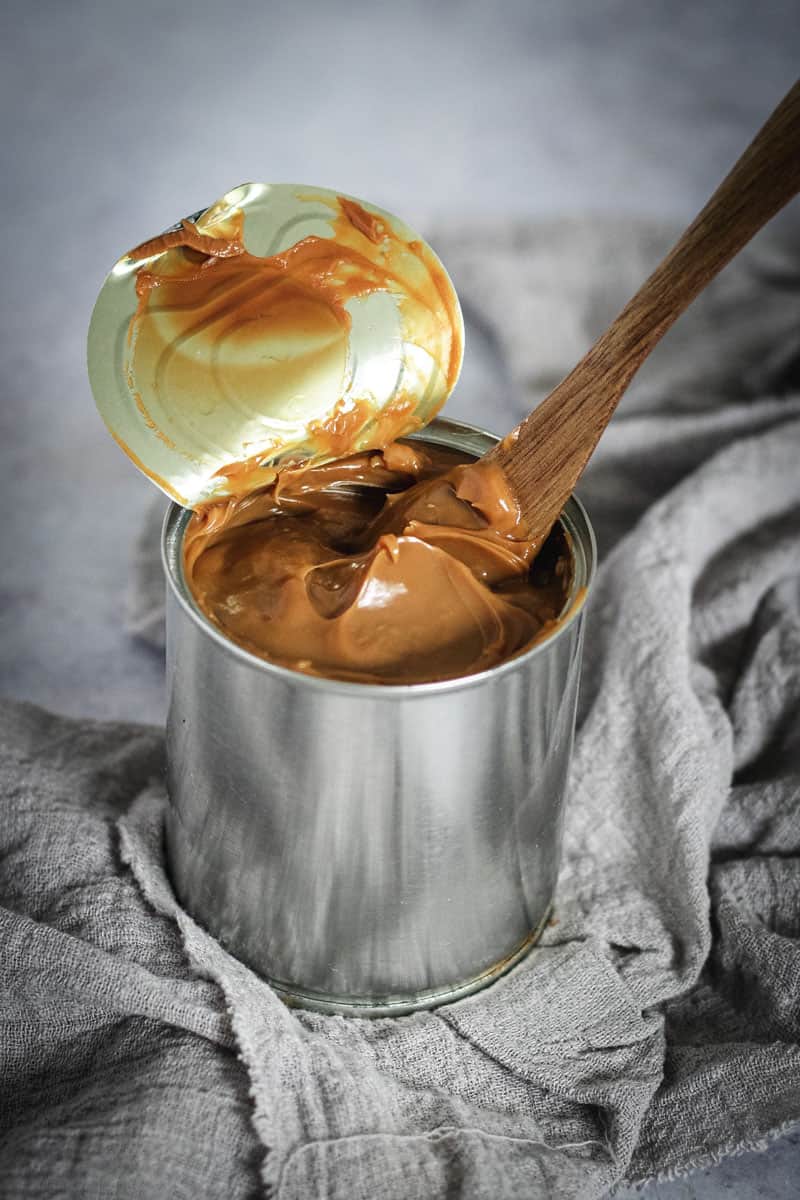
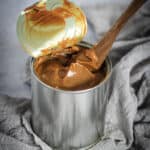
- The following day, open each can and scoop your silky smooth dulce de leche into a preserving jar for later use
Equipment
I have used a stovetop pressure cooker for this dulce de leche recipe, however, you can also use an electric pressure cooker, instant pot pressure cooker mode, or even a slow cooker – although you may need to adjust the cook time. My preferred way is pressure cooking as it is simply the fastest method and pretty much hand off. The cooking time is a fraction of the time compared with a slow cooker.
Cooks notes
I cook my own dulce de leche for 30 minutes as I’ve found that it’s the flavor I’m looking for. You can also try cooking it for less time (try 20 minutes) or more depending on your needs. The longer the cooking time results in a darker color and more intense flavor. While a shorter cooking time, will result in a paler color, milder flavor dulce de leche.
Have safety concerns? The most important thing is to let the cans of dulce de leche to come to room temperature before removing from the water and opening. After pressure cooking, there is an immense amount of pressure so you should never remove a hot can from the water. My best piece of advice is to leave overnight. Then next morning, check the can looks safe to open, then grab a spoon and dive into that delicious dulce de leche!
Want to take things up a notch?
Try adding a pinch of salt flakes or even the seeds of half a vanilla bean (or equivalent in vanilla extract) to tint the flavor to your finished dulce de leche.
Here are five of my favorite ways to use homemade dulce de leche
Sunday morning pancakes will never be the same. Add a smear of dulce de leche alongside fresh banana, a drizzle of maple syrup, and a cheeky scoop of ice cream. Or what about a crepe cake filled with layers of dulce de leche? Drool.
Amp up your favorite cheesecake recipe by adding a few scoops to the cheesecake filling before setting (or baking).
In biscuits. I’m talking about using dulce de leche to sandwich macarons, cookies (hello alfajores!) or as the star in these thumbprint cookies.
A swirl of homemade dulce de leche alongside a scoop or two of vanilla ice cream. I’m in! Better still, make a batch of icecream from scratch and swirl scoops of dulce de leche through while it’s churning.
Make a quick tart for your next dessert by filling a sweet tart shell with caramelised bananas. Top with a layer of dulce de leche and finish with a blowtorched Swiss meringue on top!
Storage
Once the dulce de leche has cooled, transfer it to a clean preserving jar or airtight container and store it in the fridge until needed. If your family is anything like mine, it will not last long! I have stored my dulce de leche in a sealed glass jar in the fridge for up to three months without any problem.
Here are a few more easy dessert recipes you might like…
- Easy Chocolate Skillet Cookie
- Apple & Pecan Cobbler
- Irish Cream Hot Chocolate
- Balsamic Roasted Strawberries
- Salted Butterscotch Whiskey Sauce
x
Start slow. Cook confidently.
Cast Iron Cooking 101
From slow cooked stews to warm bread fresh from the oven, this guide will help you feel confident cooking with cast iron at home.
Pressure Cooker Dulce De Leche – FYI It’s Super Easy!
- Prep Time: 5 minutes
- Time to full pressure: 20 minutes approx.
- Cook Time: 30 minutes
- Total Time: 55 minutes
- Yield: 1 can 1x
- Category: Preserves
- Method: Pressure Cooking
- Cuisine: South American
Description
Looking for a delicious homemade caramel sauce to drizzle over your desserts and take them up a notch? Look no further, I’m going to show you how to make the easiest sweet dessert sauce around. Say hello to pressure cooker dulce de leche!
Ingredients
- Can (or cans) of condensed milk. I always cook at least two, in case anything goes wrong I always have a spare!
Instructions
- Remove the paper label from the cans of condensed milk.
- Place the unopened can (or cans) into the pressure cooker. Cover with at least 2-3 cm of cold water. In my pressure cooker, the water level is the maximum fill line.
- Secure the pressure cooker lid and place on the stove on a high heat. Bring the pot to high pressure and maintain for 30 minutes.
- Turn off the heat and leave to naturally depressurize.
- Pop aside and leave overnight until the water is at room temperature.
- The following day, open each can and scoop your silky smooth dulce de leche into a preserving jar for later use
Notes
I used my Silit 6.5L pressure cooker for this recipe. With it’s size I can make five cans of dulce de leche at a time.
Don’t be tempted to remove (or open) the cans of condensed milk from the pressure cooker while they are still warm. For your own safety, be sure to allow the cans to come to room temperature before opening.


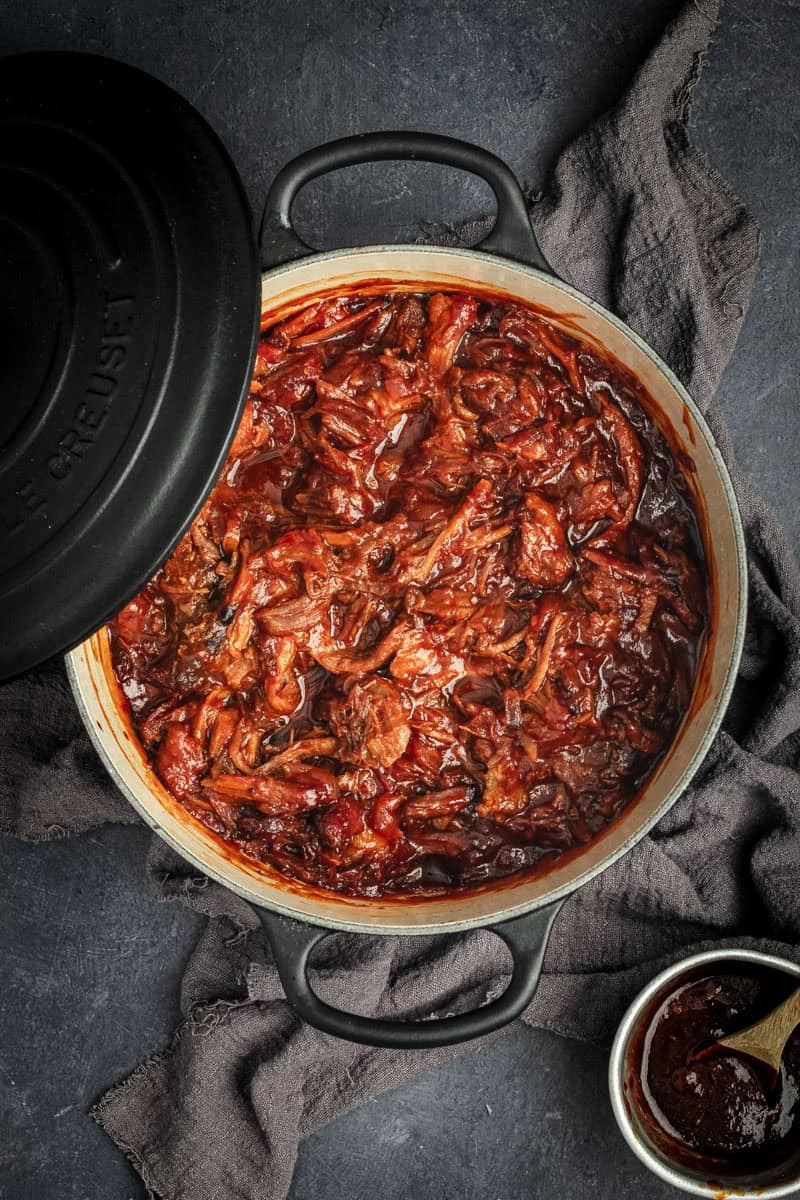


I like the dulce de Leche not too dark, this time made a perfect texture and taste dulce de Leche thank you
Thanks Jackie x