How to Use a Dutch Oven (A Beginner’s Guide to Enamel Cast Iron Cooking)
So You Bought a Dutch Oven. You’ve spent a good chunk of your wages this week and invested in something your kids will probably end up fighting over one day. A proper piece of cast iron for the kitchen. Solid. Beautiful. The kind of cookware that doesn’t get replaced every couple of years. So, now what?
Let’s talk about how to use a Dutch oven.

If you’re new here, you might not know I also run a small online store where I keep many of the tools I cook with every day, along with a few timeless homewares for good, slow living…
How to cook in enameled cast iron (quick answer)
Cooking in enameled cast iron is all about gentle heat and patience. Start by adding oil to your pot, warm it over low to medium heat, then build flavour by browning your ingredients before adding liquid and slow cooking with the lid on. Avoid high heat, let the pot preheat properly, and give it time — this is where the real magic happens.
Why I Love Cooking in Enamel Cast Iron
There’s a reason these pots have been around forever (In Le Creuset’s case, 125 years!). And it’s not just because they look good sitting on the stove.
It’s the way they cook. The enamel coating means you can skip all the fuss of seasoning. No oiling, no babying it like raw cast iron. You can just… use it, straight from the box to the stovetop.
Now let’s talk about the heat. Cooking in enamel cast iron means steady. Gentle. Reliable. It doesn’t spike and burn if you turn your back for a minute. Instead, it builds slowly, holds onto warmth, and gives you time to actually cook. Unlike other cookware, such as stainless steel, cast iron cookware retains most of the heat you put into it. That is its superpower.
It’s also one of those rare pieces that moves with you. Start something on the stovetop, slide it into the oven, and bring it straight to the table. One pot. Less mess. And bags more flavour.
If you’ve ever felt like your cooking could be easier/better/tastier… this is it. This is your time to shine!
First Things First… Unbox It.
There’s nothing quite like it, is there? Lifting the cardboard flap, removing the lid, and taking your enameled Dutch oven out of the box. That first proper look at it sitting on the bench. I imagine it’s a bit like unboxing your first Hermès Birkin… not that I’d know, but we all have our dreams.
And if it happens to be a Le Creuset (or something similar), well… you’re in very good company. Before you get too carried away, though, a couple of quick things.
Take the stickers off. All of them. I can’t tell you how many times I’ve seen those little labels baked onto the side of a pot because someone thought they’d “deal with it later.” You won’t. And they don’t come off nicely once they’ve met heat. Melted and stuck on like glue is what I hear!
Then give it a wash. Warm, soapy water, nothing more. And that’s it. No seasoning, no prep, no crazy 3-step plan. This isn’t that kind of cookware.
And just like that… you’re ready to cook something
What You Need To Know (Before You Even Turn It On)
Before you do anything else, there are a few little things that will make your life a whole lot easier.
First up… you don’t need to season it. That enamel surface has you covered.
But before we even get to the heat, add your olive oil or butter before you do anything else. That simple step alone will save you from most of the problems (food sticking, enamel cracking, etc.I
Next, and this is the big one… don’t crank the heat. It’s tempting, I know, especially if you’re used to cooking on high. But enamel cast iron doesn’t need it and just hates high temperatures. Low to medium heat is your sweet spot. It heats up a little slower, but once it’s there, it holds beautifully. My rule of thumb is to give it at least 3 minutes on low heat before you start cooking. Now this is on a gas cooktop, so if you have induction, it might well be quicker than that, but it’s a good place to start. A small pinch of flour in the bottom of your pot after a couple of minutes will tell you if it’s ready to go or not. If it sizzles, you’re good to go. If it just sits there, you may need another minute or so to heat up.
And that’s really it. No complicated rules. Just a few small things to remember, and suddenly this big, heavy pot starts to feel like the easiest thing in your kitchen to cook with. And it is!
The Simple Way to Cook in It (My Go-To Method)
If you’re standing there wondering how to actually cook in it, these are the steps I take to make sure everything cooks perfectly. Whether it’s a stew, a roast, or something slow on a Sunday… it all follows roughly these few simple steps.
- Before you even turn on the heat, add your oil or butter to your cast-iron pot. Always before the heat and food go in. It creates that little barrier that stops things catching and gives you a much better result. Also, by basting the enamel as it heats, you are guarding against your pan developing thermal shock from intense dry heat.
- Start by warming your pot gently over low heat. Give it a few minutes. You don’t need to rush this part – enamelled cast iron likes a slow start.
- From here, you can gently increase the heat a little if needed. If you’re cooking meat or building a bit of flavour, take a minute to brown things properly. Don’t rush or try to move your food around too much. Just letting it sit and do its thing. If you are cooking meat and it’s sticking (or pulling) when you try to move it, this is a clear indicator that it needs more time. This step is where a lot of the flavour comes from, even if it doesn’t feel like much is happening at the time.
- Then comes the part where you start to build your pot. Add your liquid – stock, wine, tomatoes, whatever your recipe calls for, and gently scrape up anything that’s caught on the bottom. That’s all the flavour. You want it in the dish, not stuck to the pot. What you’re scraping up there is called fond – those browned bits stuck to the bottom of the pot after searing. It might not look like much, but that’s where a huge amount of flavour lives. Once you add liquid and lift it back into the dish, everything deepens.
- Pop the lid on, and into the oven it goes. This is where the Dutch oven really does what it’s known for – creating a little culinary magic!
- Low heat and give it time for all those flavours to develop. Slow and steady wins the Dutch oven dinner race! Until it turns into something that tastes like you’ve spent far more time on it than you actually have.
- And that’s it. Enjoy!
Once you get the hang of these few steps, warm, brown, add liquid, lid on, oven – you’ll find yourself using it for everything and creating your own recipes. It’s less about following strict recipes and more about understanding how the pot works… and then letting it do the heavy lifting.
Lid On vs Lid Off (This Matters More Than You Think)
This is one of those small things that makes a big difference once you understand it. It’s really quite simple, though.
Lid on… you’re holding everything in.
Moisture, heat, flavour – it all stays tucked inside the pot. This is what you want for slow cooking. Stews, braises, anything where you’re aiming for tender meat and rich, comforting flavours. It’s gentle. The kind of cooking that does its best work while you’re off doing something other than standing by the stove.
Lid off… you’re changing it up.
The heat is still there, but now the moisture can escape. Which essentially means, over time, sauces thicken, flavours concentrate, and you’ll get a bit more colour on whatever you’re cooking. This is what I do at the end of a dish if it needs a little something extra. A few minutes without the lid can take it from “almost there” to perfect!
You don’t have to choose one or the other. Most of the time, you’ll use both. Lid on for the slow cook, lid off for the final finish. It’s a simple thing, but once you start doing it, you’ll wonder how you ever cooked without it.

My Go-To Cast Iron Pot
If there’s one piece of kitchen equipment I couldn’t live without, it’s my 24cm Le Creuset enamel Dutch oven. Steady heat, beautiful cooking and it goes from the stovetop straight to the table.
Why It Works
It’s all about how it holds heat.
Enamel cast iron warms up slowly, but once it’s there, it keeps a steady, even temperature. No hot spots, no sudden jumping in temperature, and no burning the bottom of something. Just gentle, reliable cooking.
Then there’s the lid.
Pop it on, and moisture stays inside the pot. Many of the lids (like Le Creuset & Staub) are designed for self-basting. Basically, all the condensation that rises to the lid is then redistributed back down into the pot. That means food doesn’t dry out. It softens, deepens, and builds flavour as it cooks. Plus, with Le Creuset, did you know that you can turn the lid upside down (knob side on the bench) and you have the perfect spoon rest to catch all your drips while you are cooking on the stove?
And the best part?
You don’t have to fuss over it. Once it’s going, the pot does most of the work for you.
What Should You Cook First in Your Dutch Oven?
If you’re standing in your kitchen, thinking “right… Now what?” – Start simple.
Not because you can’t do something fancy, but because this is all about building confidence. This first meal is to stop you from overthinking and just cook.
If I were there with you, I’d point you straight to one of these recipes…
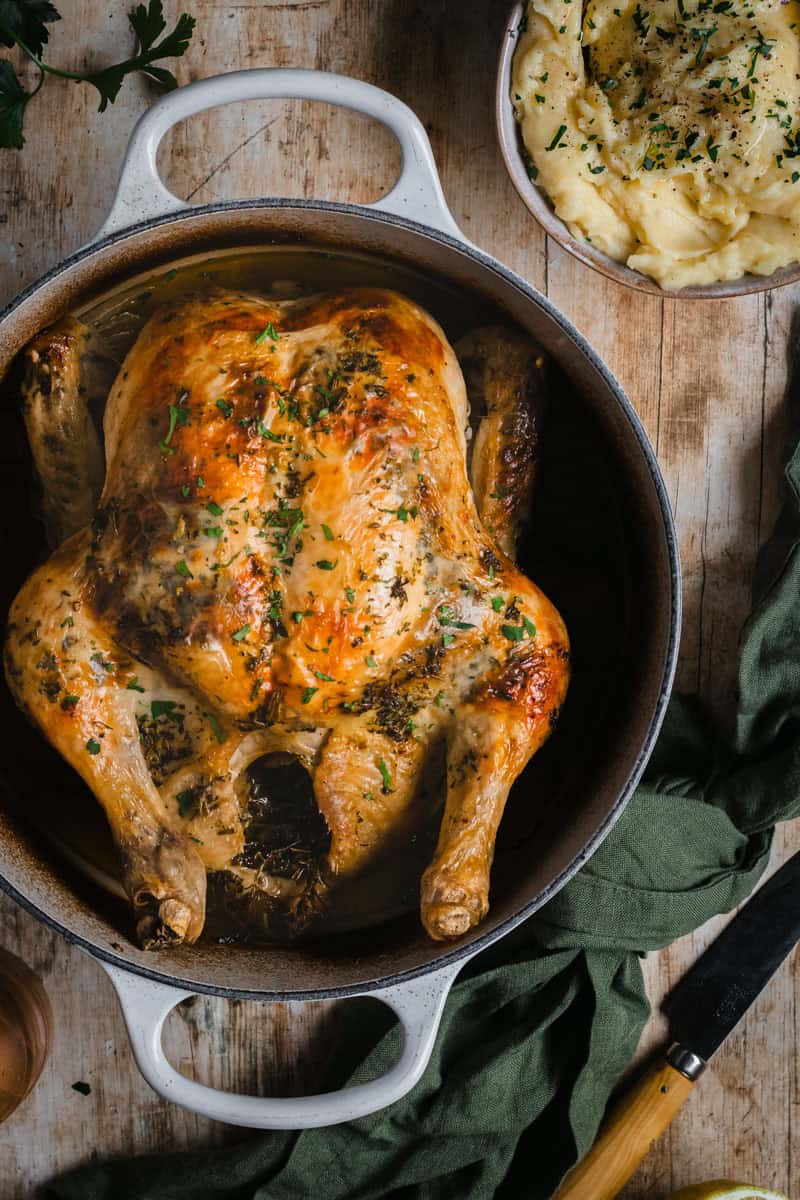
A simple roast chicken is a great place to start
It’s forgiving, it smells incredible, and it shows you exactly what this pot can do. Gentle, even heat all the way through, with a crispy skin on the outside to feel like a proper Sunday roast. Add some vegetables on the side, and you’re set. It’s my go-to Dutch oven recipe for a family dinner the whole family will love.
> Start here: your Dutch oven roast chicken
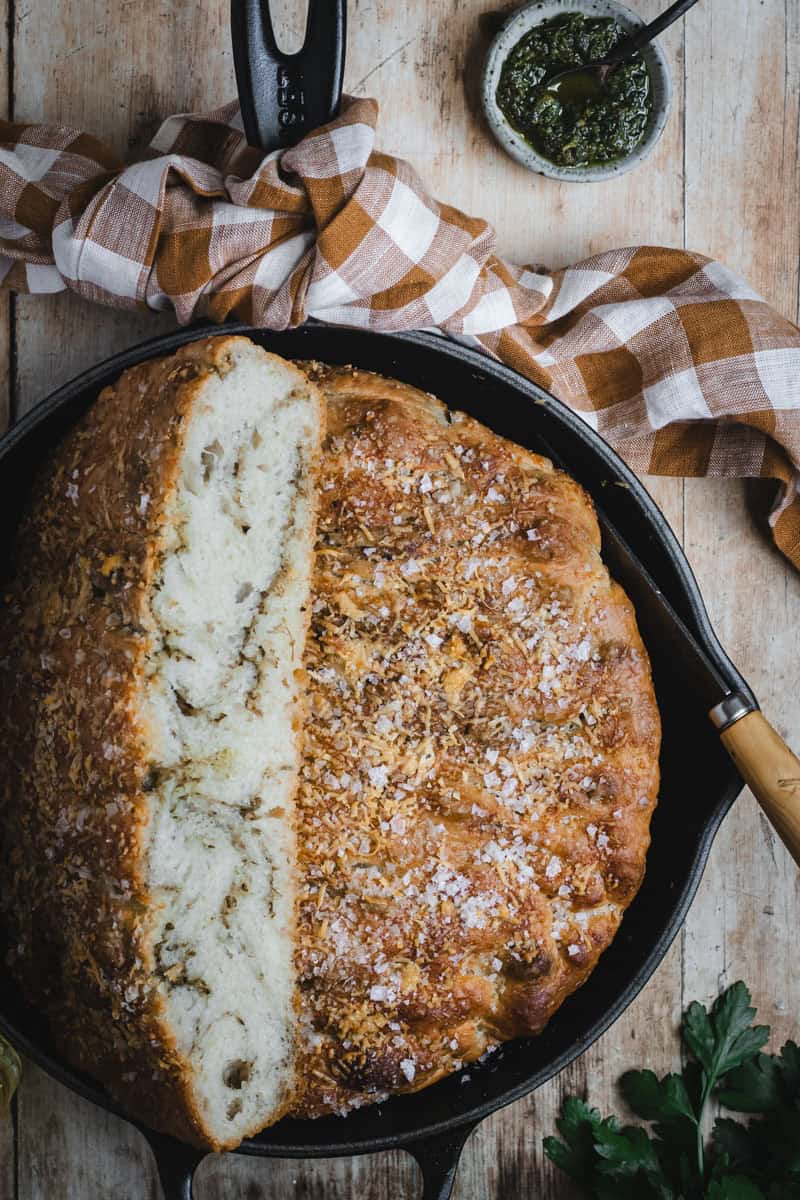
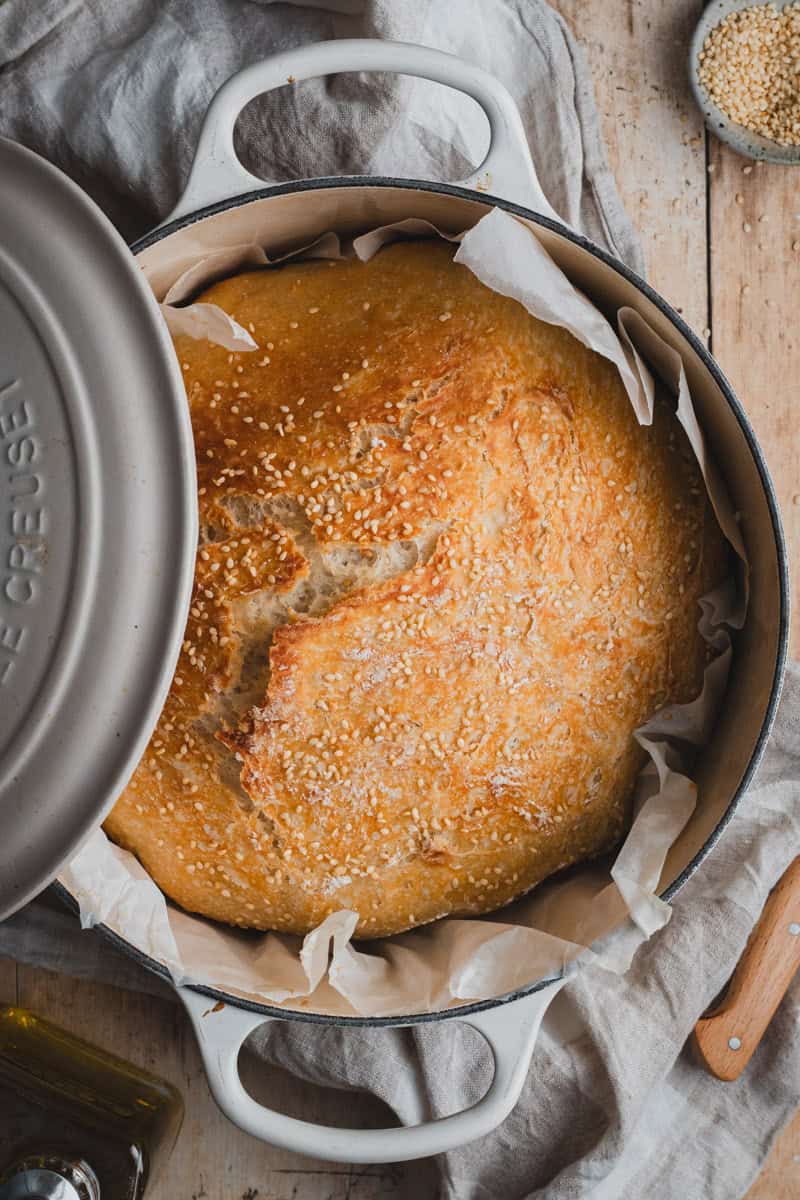
No knead bread
This one feels like a little bit of magic the first time.
Flour, water, yeast… and somehow you end up with a crusty, bakery-style rustic loaf. I know, crazy huh?! The tight-fitting lid on the Dutch oven traps the steam, which gives you that golden crust.
> Try this: your no-knead bread
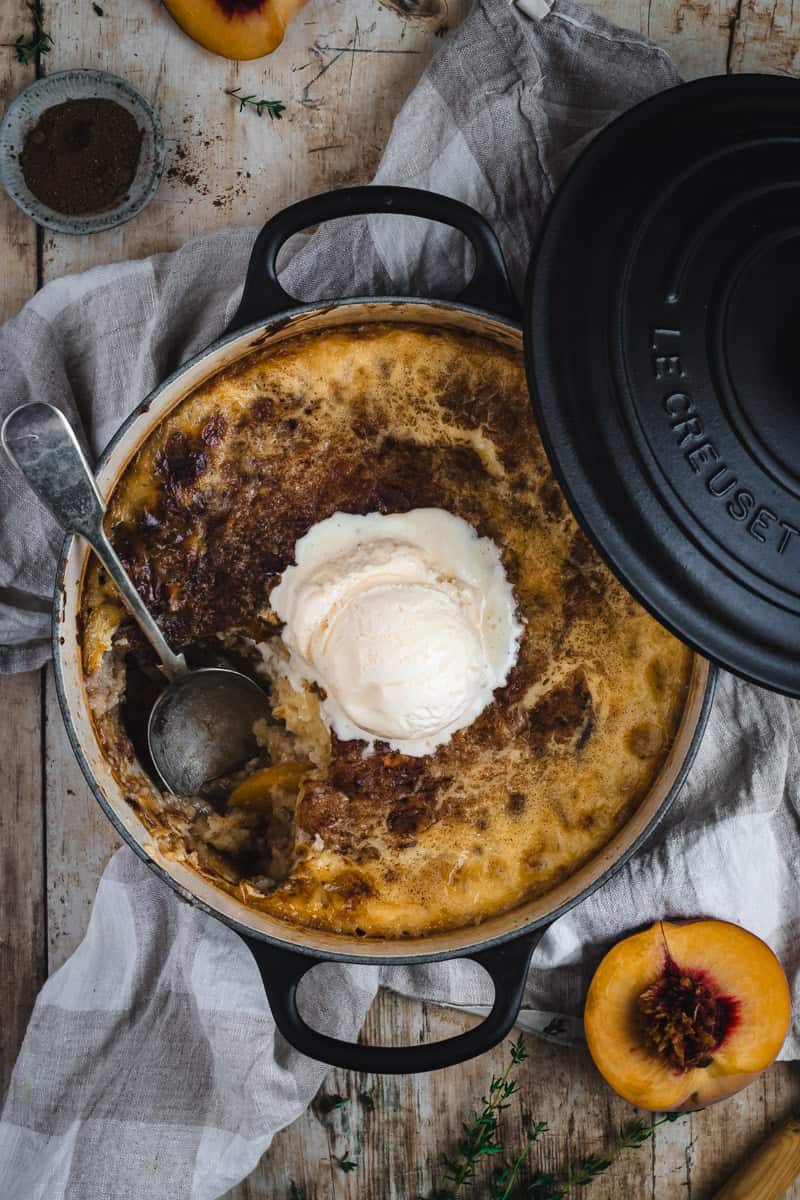
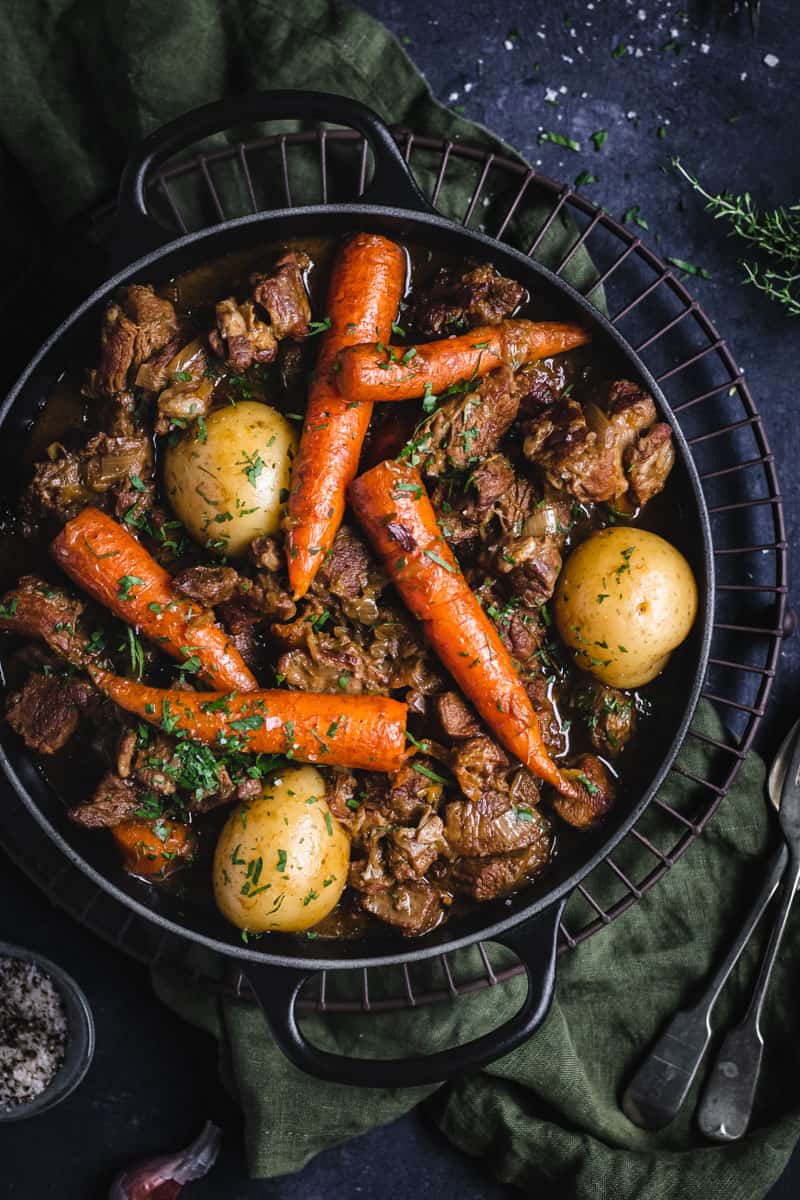
A slow-cooked stew
This is where enamel cast iron really shines. Hearty stews are my weekend jam. A bit of prep to start with. Brown everything on the stovetop, pop the lid on, into the oven… and walk away. A couple of hours later, and you’ve pulled a perfectly cooked dinner from the oven, and it’s exactly what you want on a cool evening. As a bonus, it always tastes better the next day, so be sure to cook enough for multiple dinners!
Serve it up with something simple – creamy mashed potatoes, or even a loaf of soda bread.
> Slow cook this Irish Lamb Stew

HELLO DUTCH OVEN PEOPLE!
You know you’re hooked when you start cooking just for the leftovers. We’re your people. Explore the kitchen in the Cast Iron Home Base.
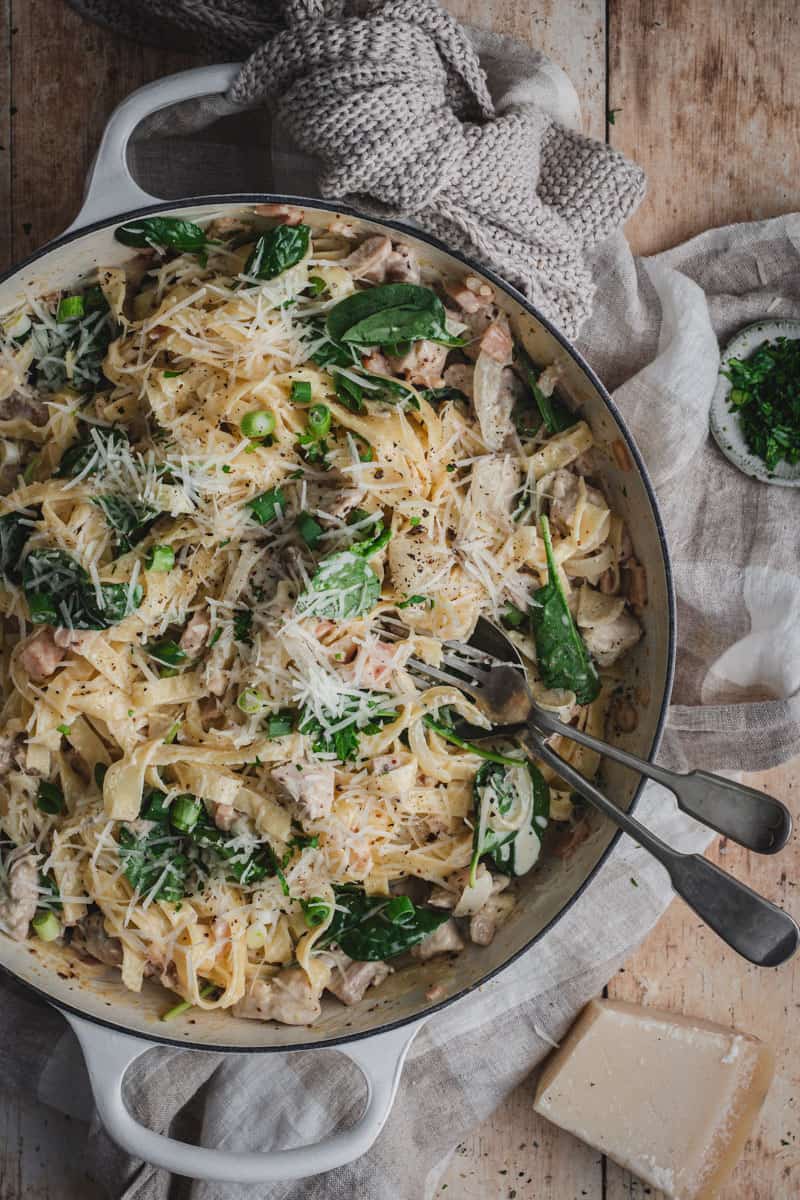
Something quick midweek
It’s not all slow Sundays. This pot handles weeknights just as well.
A simple pasta, a one-pot rice dish, even just sautéing onions and garlic… once you start using it midweek, it stops feeling “special” and just becomes part of how you cook.
The trick isn’t choosing the perfect recipe. It’s just choosing something and giving it a go.
> Try this Pasta boscaiola recipe
Common Mistakes to Avoid (And How to Fix Them)
Everyone has a few wobbly moments at the start. It takes time to adjust to new cookware, so don’t stress. Most of them come down to a couple of simple things.
Your food sticks to the bottom
Usually, the heat’s a bit too high, or there’s not quite enough oil or butter. Remember, low temperatures are your best friend! Lower the heat, give it a moment, and don’t be shy with a little fat.
Burning or catching
Again, heat. Once this pot is hot, it stays hot. If something’s catching, dial it back and let it cook more gently.
Feeling like you might ruin it
These pots are made to be used. They’re not fragile. Cook with it. Wash it. Use it again tomorrow.
Cooking on high heat
Worth repeating. Low to medium heat is where this pot shines. If you are using an induction cooktop, be sure to really be aware of your settings. Induction cooking is so much hotter than tradional gas or electric cooktops. I’ve seen enamel Dutch ovens that have had the enamel “pop off” the base because they’ve been put on high heat on an induction stovetop.
What Not To Do When Cooking In Enameled Cast Iron
A few things that will trip you up if you’re not aware of them:
Don’t crank the heat — this pot doesn’t need it
Don’t add cold liquid straight into a very hot pot
Don’t preheat it empty on high heat
Don’t overcrowd when browning (work in batches if needed)
Once you get a feel for it, these become second nature.
How to Clean and Care for Your Enameled Cast Iron Dutch Oven
Keep it simple.
Firstly, (and this is a big one!), let it cool. Sudden temperature changes can damage your pot – plunging a hot pot into cold water is a big no-no! So let it cool down, then wash with warm, soapy water. Avoid harsh scrubbing and using anything abrasive, as you can damage the enamel surface. A soft sponge or pot brush is my weapon of choice for cleaning my cast-iron pots and pans. And for anything stubborn, let it soak for a bit first. It’s made for everyday cooking, not precious handling, but with proper care, it will last a lifetime.
The One Thing That Will Make You Better at Using It
Just use it.
Start simple. Cook often. Let yourself get comfortable with it. You don’t need to master it overnight. I certainly didn’t. You don’t need to get everything perfect.
The more you use it, the more natural it feels… and before long, it’ll be your go-to pot you reach for every day.
FAQ’s
There you go. A proper “start here” guide. I hope it helps you get started in your cast-iron cooking journey.
And honestly? The best thing you can do now…
Put it on the stove and cook something simple tonight.
x
Start slow. Cook confidently.
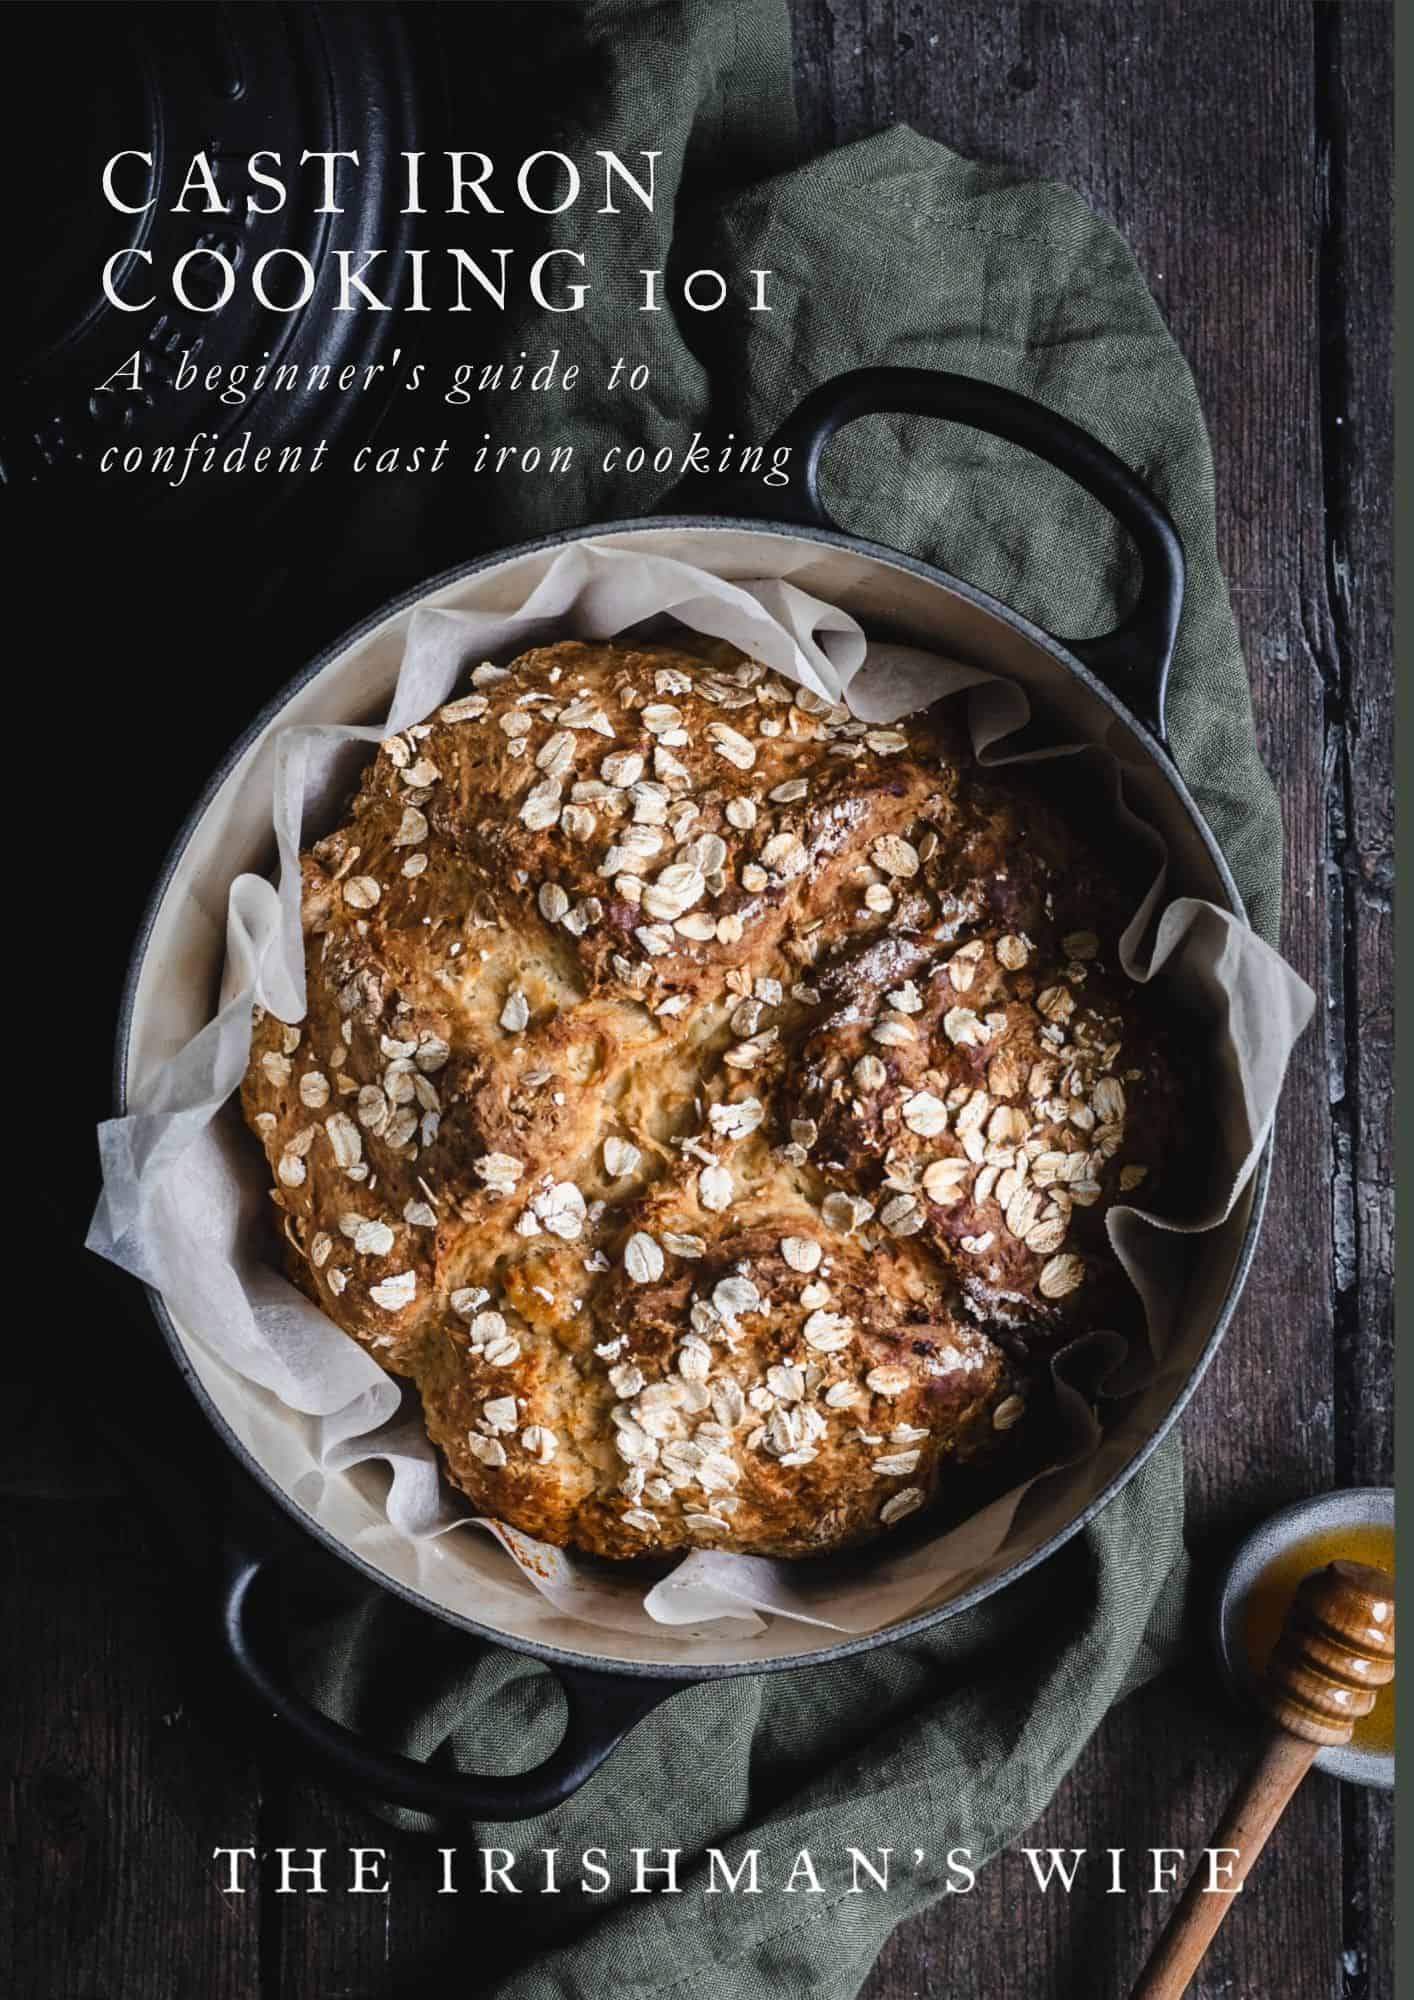
Cast Iron Cooking 101
From slow cooked stews to warm bread fresh from the oven, this guide will help you feel confident cooking with cast iron at home.